
GQEBERHA, South Africa, October 22, 2026: South Africa completed one of the most extraordinary reversals in their Test history on Thursday, recovering from 110/6 to defeat Australia by an innings and 31 runs at St George’s Park and level the three-match series 1-1. Captain Temba Bavuma’s career-best 179 transformed an apparently hopeless first innings into 425/9 declared, before Marco Jansen’s 5/33 demolished Australia for 99. Travis Head’s defiant 121 and Scott Boland’s extraordinary 166-ball resistance threatened to rescue a draw, but Kagiso Rabada, Wiaan Mulder and Jansen secured the final six wickets on a rain-interrupted fifth day.
Australia had arrived in Gqeberha leading 1-0 after their 214-run victory in Durban, and Scott Boland’s five wickets initially threatened to settle the series with a game remaining. Instead, Bavuma inspired a recovery worth 315 runs after South Africa’s sixth wicket fell, aided by Marco Jansen’s attacking 85 and Simon Harmer’s invaluable 82. Australia could not match those runs across two complete innings, finishing with 99 and 295. The result earned South Africa 12 World Test Championship points and turned the final Test at Cape Town, beginning October 27, into a series decider.
South Africa vs Australia Second Test: Final Result and Match Summary
| Match Detail | Information |
|---|---|
| Match | Second Test, Australia tour of South Africa 2026 |
| Dates | October 18-22, 2026 |
| Venue | St George’s Park, Gqeberha |
| Toss | Australia won and elected to bowl |
| South Africa | 425/9 declared, 127.1 overs |
| Australia, first innings | 99 all out, 42.3 overs |
| Australia, following on | 295 all out, 107.1 overs |
| Result | South Africa won by an innings and 31 runs |
| Player of the Match | Temba Bavuma, 179 |
| South Africa’s leading bowler | Marco Jansen, 5/33 in Australia’s first innings |
| Australia’s leading batter | Travis Head, 121 in the second innings |
| Australia’s leading bowler | Scott Boland, 5/81 |
| World Test Championship points | South Africa 12, Australia 0 |
| Series standing | Level 1-1 |
| Third Test | October 27-31, Newlands, Cape Town |
The scorecard captures the remarkable disparity between the teams. South Africa lost nine wickets while scoring 425 runs. Australia lost 20 wickets while scoring a combined 394.
The hosts required only one batting innings to secure victory, despite losing much of the first two days to rain and the opening session on the final day to wet conditions.
Story at a glance

South Africa vs Australia Second Test: Final Result and Match Summary
The scorecard captures the remarkable disparity between the teams. South Africa lost nine wickets while scoring 425 runs. Australia lost 20 wickets while scoring a combined 394.
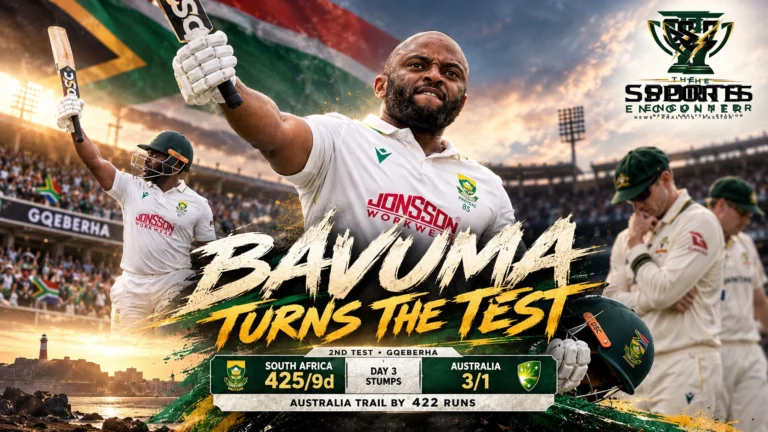
From 110/6 to 425/9: How Bavuma Turned a Lost Position Into a Winning One
South Africa’s victory began in conditions that appeared to favor Australia.
Bavuma’s 179: The Captain Who Refused to Let Australia Finish the Job
Bavuma’s innings was much more than a conventional Test century.
Jansen’s 85 and Harmer’s 82: The Contributions That Changed Australia’s Expectations
Marco Jansen’s arrival at 110/6 changed the tempo of South Africa’s innings.
South Africa First Innings: Complete Batting Scorecard
Fall of wickets: 12/1 (Markram, 8.4), 12/2 (Bedingham, 8.5), 25/3 (Ackerman, 14.3), 40/4 (Breetzke, 21.3), 92/5 (Rickelton, 39.4), 110/6 (Mulder, 49.6), 242/7 (Jansen, 80.5), 425/8 (Harmer, 126.6), 425/9 (Bavuma, 127.1).
The result also reversed the story of the series.
In Durban, Matt Renshaw’s 190 and Josh Hazlewood’s 6/49 had helped Australia secure a commanding 214-run victory. South Africa responded with a performance built around sustained batting resistance, disciplined pace bowling and the ability to finish a match that threatened to escape them through the weather.
The Sports Encounter’s complete first-Test report on Renshaw and Hazlewood’s Durban triumph provides the background to this remarkable reversal.
From 110/6 to 425/9: How Bavuma Turned a Lost Position Into a Winning One
South Africa’s victory began in conditions that appeared to favor Australia.
Pat Cummins won the toss and elected to bowl, trusting his pace attack on a surface offering movement and assistance to the seamers.
Boland justified that decision almost immediately.
He bowled Aiden Markram for 11 before dismissing David Bedingham for a first-ball duck with the next delivery. Marques Ackerman, making his Test debut, followed for six.
South Africa were 25/3 after 14.3 overs.
Mitchell Starc removed Matthew Breetzke for four, leaving the hosts 40/4, and Boland later dismissed Ryan Rickelton for 31.
The scoreboard stood at 92/5.
Bavuma, who had walked in with his team already under pressure, was watching partners disappear while the rain repeatedly interrupted play.
At the close of the second day, he was unbeaten on 41 and South Africa had reached only 97/5 from 43 overs.
The situation deteriorated again on day three when Starc removed Wiaan Mulder for 13.
South Africa were 110/6 after 50 overs.
That should have been the moment Australia exposed the tail and completed a commanding position.
Instead, Bavuma found two partners capable of changing the match.
The 315-Run Rescue: South Africa’s Decisive Partnerships
| Partnership | Batters | Runs Added | Team Score | Match Significance |
|---|---|---|---|---|
| Seventh wicket | Bavuma and Marco Jansen | 132 | 110/6 to 242/7 | Rescued South Africa from collapse |
| Eighth wicket | Bavuma and Simon Harmer | 183 | 242/7 to 425/8 | Turned recovery into dominance |
| Ninth wicket | Bavuma and Kagiso Rabada | 0 | 425/8 to 425/9 | Bavuma dismissed immediately before declaration |
| Runs After 110/6 | Bavuma with lower-order partners | 315 | 425/9 declared | 74.1% of South Africa’s innings total |
The defining statistic: South Africa scored only 110 runs before losing six wickets, then added another 315 while losing just three more wickets before declaring.
Those final 315 runs represented approximately 74.1 percent of the innings. Australia subsequently scored 394 runs across two full innings, only 79 more than South Africa added after falling to 110/6.
It is difficult to find a clearer illustration of the price Australia paid for failing to finish the innings.
Bavuma’s 179: The Captain Who Refused to Let Australia Finish the Job
Bavuma’s innings was much more than a conventional Test century.
He faced 334 deliveries across 552 minutes, scoring 179 with 18 fours and a six.
It was his highest Test score, surpassing the 172 he made against West Indies in 2023.
The circumstances made it especially impressive.
Bavuma repeatedly had to restart his concentration following rain delays, absorb the pressure of early wickets and negotiate Boland’s relentless accuracy.
He also had to change his batting approach as South Africa’s innings developed.
With the upper order collapsing, survival was the priority. Once Jansen arrived, Bavuma could share the responsibility of scoring. When Harmer joined him, he returned to the patient accumulation that gradually exhausted Australia’s attack.
His innings was not built around one extended burst of strokeplay. It was constructed through changing match situations and a refusal to surrender his wicket.
His 179 represented 42.1 percent of South Africa’s total.
More remarkably, Bavuma, Jansen and Harmer scored 346 of the team’s 425 runs between them, contributing 81.4 percent of the innings.
The ICC’s official report on Bavuma’s career-best innings detailed his remarkable recovery and the lower-order contributions that supported him.
The Sports Encounter had followed this transformation as it unfolded in its day-three analysis of Bavuma’s 179 and South Africa’s recovery from 92/5.
That earlier report identified the opportunity Bavuma had created. Three days of intense cricket later, the captain had converted it into a series-saving victory.
Jansen’s 85 and Harmer’s 82: The Contributions That Changed Australia’s Expectations
Marco Jansen’s arrival at 110/6 changed the tempo of South Africa’s innings.
The tall left-arm all-rounder scored 85 from 100 deliveries, striking nine fours and three sixes.
He refused to let Australia dictate terms simply because the scoreboard showed six wickets down.
His attacking intent shifted pressure onto the bowlers, particularly when Australia attempted to use short-pitched deliveries and attacking fields to finish the innings.
Jansen eventually fell to Boland, caught by Travis Head, after adding 132 with Bavuma.
At 242/7, Australia might still have expected the innings to end well below 300.
Simon Harmer ensured that it did not.
His 82 from 157 deliveries was a remarkable contribution from a specialist spinner. He struck ten fours and a six while displaying patience that matched Bavuma’s increasingly assured approach.
Together, Bavuma and Harmer added 183 for the eighth wicket.
By the time Marnus Labuschagne bowled Harmer, South Africa had reached 425.
Starc removed Bavuma with the very next ball, but the hosts had already established a formidable total. Bavuma declared at 425/9, leaving Anrich Nortje unused as a batter.
For Australia, the late collapse of the South African innings offered little consolation.
The decisive damage had occurred during the partnerships that preceded it.
South Africa First Innings: Complete Batting Scorecard
| Batter | Dismissal | R | B | 4s | 6s |
|---|---|---|---|---|---|
| Aiden Markram | b Boland | 11 | 28 | 2 | 0 |
| Marques Ackerman | c Carey b Boland | 6 | 38 | 0 | 0 |
| David Bedingham | c Carey b Boland | 0 | 1 | 0 | 0 |
| Temba Bavuma (c) | c Carey b Starc | 179 | 334 | 18 | 1 |
| Matthew Breetzke | c Carey b Starc | 4 | 17 | 0 | 0 |
| Ryan Rickelton (wk) | c Renshaw b Boland | 31 | 51 | 5 | 0 |
| Wiaan Mulder | c Renshaw b Starc | 13 | 38 | 1 | 0 |
| Marco Jansen | c Head b Boland | 85 | 100 | 9 | 3 |
| Simon Harmer | b Labuschagne | 82 | 157 | 10 | 1 |
| Kagiso Rabada | Not out | 0 | 0 | 0 | 0 |
| Anrich Nortje | Did not bat | — | — | — | — |
| Extras | 8 leg-byes, 1 no-ball, 5 wides | 14 | — | — | — |
| Total | 425/9 declared, 127.1 overs | 425 | — | 45 | 5 |
Fall of wickets: 12/1 (Markram, 8.4), 12/2 (Bedingham, 8.5), 25/3 (Ackerman, 14.3), 40/4 (Breetzke, 21.3), 92/5 (Rickelton, 39.4), 110/6 (Mulder, 49.6), 242/7 (Jansen, 80.5), 425/8 (Harmer, 126.6), 425/9 (Bavuma, 127.1).
Australia Bowling: Boland’s Five Wickets Could Not Prevent the Rescue
| Bowler | O | M | R | W | Econ |
|---|---|---|---|---|---|
| Mitchell Starc | 24.1 | 4 | 89 | 3 | 3.68 |
| Josh Hazlewood | 14 | 2 | 43 | 0 | 3.07 |
| Scott Boland | 29 | 7 | 81 | 5 | 2.79 |
| Pat Cummins | 26 | 3 | 96 | 0 | 3.69 |
| Beau Webster | 19 | 6 | 43 | 0 | 2.26 |
| Matt Renshaw | 8 | 1 | 33 | 0 | 4.13 |
| Nic Maddinson | 5 | 0 | 24 | 0 | 4.80 |
| Marnus Labuschagne | 2 | 0 | 8 | 1 | 4.00 |
Boland’s 5/81 from 29 overs, including seven maidens, was an outstanding individual performance that deserved a much stronger result.
He took the early wickets that placed South Africa in trouble, then returned to remove Jansen. But Australia’s inability to dismiss Bavuma and Harmer prevented those breakthroughs from producing a manageable first-innings target.
The contrast with Durban was striking.
In the first Test, Renshaw had rescued Australia after South Africa reduced the visitors to 124/6. In Gqeberha, Australia found themselves unable to close out South Africa from 110/6.
Those contrasting recoveries were central to our earlier analysis of Renshaw’s remarkable 190 and the value of lower-order partnerships.
The difference this time was that Bavuma made Australia pay even more heavily for failing to finish the innings.
Jansen’s 5/33 Leaves Australia in Ruins at 99 All Out
If Bavuma’s innings created South Africa’s advantage, Jansen’s bowling transformed it into a match-winning opportunity.
Australia began their reply with a deficit of 425 runs and lost Nic Maddinson for a duck in the first over, caught by Simon Harmer off Rabada.
Jansen then took control.
He removed nightwatchman Scott Boland for two and trapped Travis Head lbw for 14, leaving Australia 22/3.
South Africa’s pace attack repeatedly challenged the Australian top order with bounce, seam movement and disciplined lines.
Anrich Nortje dismissed Marnus Labuschagne for 14 before leaving the field with a suspected groin injury.
Steven Smith attempted to build an innings, facing 88 deliveries for 28 runs, but Australia’s middle order could not withstand Jansen’s next spell.
Matt Renshaw fell for 12, Alex Carey for a duck and Beau Webster for 13, all dismissed by Jansen.
Australia had collapsed to 84/7.
Wiaan Mulder bowled Smith for 28 and later removed Pat Cummins for seven, while Rabada dismissed Mitchell Starc for one.
The innings ended at 99 in just 42.3 overs.
Jansen finished with 5/33 from 11 overs, claiming five wickets while bowling just 66 legal deliveries.
South Africa held a first-innings lead of 326 runs, and Bavuma immediately enforced the follow-on.
The Sports Encounter’s detailed day-four report on Jansen’s five-wicket haul and Australia’s collapse examined how the Proteas seized control before Head began the second-innings resistance.
Australia First Innings: Complete Batting Scorecard
| Batter | Dismissal | R | B | 4s | 6s |
|---|---|---|---|---|---|
| Nic Maddinson | c Harmer b Rabada | 0 | 4 | 0 | 0 |
| Travis Head | lbw b Jansen | 14 | 24 | 3 | 0 |
| Scott Boland | c Rickelton b Jansen | 2 | 14 | 0 | 0 |
| Marnus Labuschagne | c Harmer b Nortje | 14 | 25 | 3 | 0 |
| Steven Smith | b Mulder | 28 | 88 | 2 | 0 |
| Matt Renshaw | c Harmer b Jansen | 12 | 48 | 0 | 0 |
| Alex Carey (wk) | c Rickelton b Jansen | 0 | 2 | 0 | 0 |
| Beau Webster | c Markram b Jansen | 13 | 28 | 2 | 0 |
| Pat Cummins (c) | c Breetzke b Mulder | 7 | 16 | 1 | 0 |
| Mitchell Starc | c Rickelton b Rabada | 1 | 4 | 0 | 0 |
| Josh Hazlewood | Not out | 2 | 3 | 0 | 0 |
| Extras | 4 byes, 1 leg-bye, 1 no-ball | 6 | — | — | — |
| Total | 99 all out in 42.3 overs | 99 | — | 11 | 0 |
Fall of wickets: 0/1 (Maddinson, 0.4), 11/2 (Boland, 5.1), 22/3 (Head, 9.2), 45/4 (Labuschagne, 13.6), 65/5 (Renshaw, 29.4), 65/6 (Carey, 29.6), 84/7 (Webster, 37.4), 96/8 (Smith, 40.4), 97/9 (Starc, 41.2), 99/10 (Cummins, 42.3).
South Africa Bowling: Australia’s First-Innings Collapse
| Bowler | O | M | R | W | Econ |
|---|---|---|---|---|---|
| Kagiso Rabada | 12 | 2 | 33 | 2 | 2.75 |
| Simon Harmer | 5.3 | 0 | 9 | 0 | 1.64 |
| Aiden Markram | 1 | 1 | 0 | 0 | 0.00 |
| Marco Jansen | 11 | 2 | 33 | 5 | 3.00 |
| Anrich Nortje | 3.3 | 0 | 5 | 1 | 1.43 |
| Wiaan Mulder | 9.3 | 3 | 14 | 2 | 1.47 |
Australia’s innings included six batters who failed to reach double figures and a highest score of just 28 from Smith.
The collapse also demonstrated the value of Rabada’s return after missing the first Test through injury.
His early dismissal of Maddinson gave South Africa immediate control, allowing Jansen and the other bowlers to attack rather than defend.
Before the match, The Sports Encounter examined the significance of Rabada’s return to Gqeberha and his remarkable 2018 record against Australia.
His presence would become even more important when the Proteas lost Nortje as a bowling option.
Travis Head’s 121 Gives Australia Hope After Following On
Australia’s second innings began under enormous pressure.
The visitors needed 326 runs merely to erase South Africa’s first-innings advantage and 327 to move ahead.
A draw increasingly appeared to be the only realistic route out of the contest.
Maddinson fell again, this time for eight, giving Rabada another early wicket.
Head then produced Australia’s most substantial innings of the match.
He attacked when opportunities appeared but also demonstrated the patience required to occupy the crease for an extended period.
Head and Labuschagne carried the score to 100 before Harmer removed Labuschagne for 39.
Rabada dismissed Renshaw for 11, and Harmer trapped Webster lbw for eight.
Australia were 150/4.
Scott Boland joined Head in an unusual role as nightwatchman and began one of the most determined defensive efforts of the series.
At the close of day four, Head was unbeaten on 87, Boland had two, and Australia stood at 156/4 after 54 overs.
The visitors still trailed by 170 runs, but six wickets remained.
The weather then offered Australia another source of hope.
Rain and wet-ground conditions prevented play during the opening session of the final day, leaving South Africa with fewer overs in which to complete victory.
When play resumed, Head and Boland continued to frustrate the home attack.
Head reached his century from 151 balls and eventually scored 121 from 190, striking 15 boundaries.
The pair added 59 for the fifth wicket, consuming 161 legal deliveries between the fall of Webster at 47.5 overs and Head’s dismissal at 74.4.
For a significant period, Australia appeared capable of occupying enough time to escape with a draw.
But Wiaan Mulder changed the direction of the day.
Wiaan Mulder’s Three Wickets: The Performance That Finally Broke Australia’s Resistance
With South Africa searching for breakthroughs and Head established beyond his century, Bavuma turned to Mulder.
The all-rounder produced the delivery South Africa needed, bowling Head for 121.
Australia were 209/5.
The wicket removed the batter most capable of extending the resistance through the remaining sessions.
Smith entered later than his usual position while dealing with a neck problem, but he could manage only three from 20 deliveries before Rabada had him caught by Matthew Breetzke.
At 225/6, Australia remained well behind.
Boland, however, continued to block everything he reasonably could.
He eventually reached 40 from 166 deliveries, striking six boundaries while demonstrating remarkable concentration for a specialist fast bowler.
He had occupied the crease for 187 minutes.
South Africa’s bowlers had repeatedly beaten the bat, but Boland refused to surrender cheaply.
Mulder eventually removed him with a delivery that seamed back sharply and bowled the nightwatchman.
Australia were 256/7.
Mulder followed by bowling Cummins for four at 262/8.
Across Australia’s second innings, Mulder dismissed Head, Boland and Cummins, three wickets that proved essential to securing the result.
His figures of 3/64 from 21 overs did not fully capture the timing of those breakthroughs.
Mulder also contributed to the first-innings demolition with 2/14, dismissing Smith and Cummins.
He finished the match with five wickets for 78 runs.
That contribution merits substantial recognition alongside the more conspicuous performances of Bavuma and Jansen.
Rabada and Jansen Finish the Job as Australia Fall 31 Runs Short
After Boland’s dismissal, Australia still had Alex Carey at the crease and enough time left to make South Africa work for victory.
Carey produced a composed unbeaten 37 from 69 deliveries.
Mitchell Starc supported him with 11 from 28 balls, taking Australia to 290/8.
Rabada then bowled Starc at 104.5 overs, leaving South Africa one wicket away from victory.
Josh Hazlewood arrived with Australia on 290/9.
Carey added a few more runs, but the final breakthrough came at 107.1 overs when Jansen drew Hazlewood into a drive outside off stump.
The ball took a thick outside edge, and Aiden Markram completed the catch at second slip.
Australia were all out for 295.
South Africa had won by an innings and 31 runs.
Rabada finished the second innings with 4/77, while Mulder claimed 3/64 and Harmer 2/93.
Jansen’s final wicket completed match figures of 6/67, alongside his crucial 85 with the bat.
South Africa had successfully defended its enormous first-innings advantage despite the weather and Australia’s prolonged resistance.
Australia Second Innings: Complete Batting Scorecard
| Batter | Dismissal | R | B | 4s | 6s |
|---|---|---|---|---|---|
| Nic Maddinson | c Rickelton b Rabada | 8 | 10 | 2 | 0 |
| Travis Head | b Mulder | 121 | 190 | 15 | 0 |
| Marnus Labuschagne | c Jansen b Harmer | 39 | 98 | 4 | 0 |
| Matt Renshaw | b Rabada | 11 | 23 | 2 | 0 |
| Beau Webster | lbw b Harmer | 8 | 33 | 0 | 0 |
| Scott Boland | b Mulder | 40 | 166 | 6 | 0 |
| Steven Smith | c Breetzke b Rabada | 3 | 20 | 0 | 0 |
| Alex Carey (wk) | Not out | 37 | 69 | 4 | 0 |
| Pat Cummins (c) | b Mulder | 4 | 8 | 1 | 0 |
| Mitchell Starc | b Rabada | 11 | 28 | 1 | 0 |
| Josh Hazlewood | c Markram b Jansen | 0 | 2 | 0 | 0 |
| Extras | 4 byes, 5 leg-byes, 4 no-balls | 13 | — | — | — |
| Total | 295 all out in 107.1 overs | 295 | — | 35 | 0 |
Fall of wickets: 8/1 (Maddinson, 2.4), 100/2 (Labuschagne, 31.6), 123/3 (Renshaw, 38.5), 150/4 (Webster, 47.5), 209/5 (Head, 74.4), 225/6 (Smith, 82.1), 256/7 (Boland, 94.6), 262/8 (Cummins, 96.5), 290/9 (Starc, 104.5), 295/10 (Hazlewood, 107.1).
South Africa Second-Innings Bowling Scorecard
| Bowler | O | M | R | W | Econ |
|---|---|---|---|---|---|
| Kagiso Rabada | 23 | 3 | 77 | 4 | 3.35 |
| Marco Jansen | 17.1 | 3 | 34 | 1 | 1.98 |
| Wiaan Mulder | 21 | 5 | 64 | 3 | 3.05 |
| Simon Harmer | 39 | 8 | 93 | 2 | 2.38 |
| Aiden Markram | 7 | 1 | 18 | 0 | 2.57 |
Harmer’s 39 overs were particularly valuable because Nortje was unavailable to bowl in the second innings after his earlier suspected groin injury.
By maintaining control from one end, Harmer allowed Bavuma to rotate his available seamers more effectively.
Rabada, Jansen and Mulder shared eight wickets in the second innings, while Harmer collected the remaining two.
South Africa’s Collective Bowling Performance: The Match-Winning Combination
| Bowler | First Innings | Second Innings | Match Wickets | Runs Conceded |
|---|---|---|---|---|
| Kagiso Rabada | 2/33 | 4/77 | 6 | 110 |
| Marco Jansen | 5/33 | 1/34 | 6 | 67 |
| Wiaan Mulder | 2/14 | 3/64 | 5 | 78 |
| Simon Harmer | 0/9 | 2/93 | 2 | 102 |
| Anrich Nortje | 1/5 | Did not bowl | 1 | 5 |
| Wickets Taken | 10 | 10 | 20 | — |
Jansen and Rabada each finished with six wickets, while Mulder’s five came at moments that repeatedly interrupted Australia’s efforts to establish partnerships.
The combined wicket tally also demonstrates that South Africa’s victory was not dependent on one outstanding bowler.
Jansen inflicted the initial damage. Rabada supplied sustained quality after returning from injury. Mulder delivered crucial breakthroughs during Australia’s final-day resistance, and Harmer provided endurance when South Africa needed control.
Harmer’s 39 Overs and Nortje’s Injury: The Tactical Challenge Bavuma Had to Manage
South Africa’s final-day victory became more difficult after Nortje left the field during Australia’s first innings with a suspected groin injury.
He had bowled only 3.3 overs and taken the wicket of Labuschagne before his departure.
Nortje did not bowl during Australia’s second innings.
The absence reduced Bavuma’s pace-bowling resources precisely when South Africa were attempting to dismiss Australia twice in succession.
That placed extra demands on Rabada, Jansen and Mulder.
Harmer’s role became just as important.
The spinner bowled 39 overs, including eight maidens, while taking two wickets for 93 runs.
His economy rate of 2.38 runs per over helped prevent Australia from rebuilding its innings at a pace that might have shifted the pressure back onto South Africa.
Harmer had already contributed 82 runs with the bat.
His combined batting and bowling workload made him one of the most influential players in the match.
The Sports Encounter’s pre-match analysis of South Africa’s selection changes and Australia’s squad balance examined how the teams approached the second Test.
The match ultimately demonstrated the value of a varied attack capable of responding to unexpected circumstances.
The Five-Day Story: How Rain, Resistance and Ruthlessness Shaped the Result
The match’s unusual rhythm makes the result even more impressive.
Most of the first two days were affected by rain, and South Africa began day three in serious difficulty.
By the final session of day five, however, the home side had completed two full Australian innings and secured an innings victory.
South Africa vs Australia Second Test: Day-by-Day Timeline
| Day | Date | Close-of-Play Position | Defining Development |
|---|---|---|---|
| 1 | Oct. 18 | South Africa 20/2 | Boland takes two wickets in two deliveries |
| 2 | Oct. 19 | South Africa 97/5 | Australia retain control through rain-shortened play |
| 3 | Oct. 20 | South Africa 425/9 declared; Australia 3/1 | Bavuma 179, Jansen 85 and Harmer 82 transform the match |
| 4 | Oct. 21 | Australia 99 and 156/4 following on | Jansen’s 5/33 enforces the follow-on; Head reaches 87 not out |
| 5 | Oct. 22 | Australia 295 all out | Mulder, Rabada and Jansen break Australia’s resistance |
Only 43 overs were completed across the first two days.
Australia had every reason to believe the weather would work in its favor after reducing South Africa to 97/5.
But Bavuma’s long innings and the pace attack’s demolition of Australia’s first innings fundamentally altered the balance of available time.
South Africa no longer needed to bat again. Its bowlers could concentrate on taking 20 wickets before the final scheduled close.
Even then, Australia showed enough resistance to threaten a draw.
The first session on day five was lost to wet conditions, and Head and Boland continued to consume valuable deliveries when play resumed.
South Africa’s ability to keep searching for wickets while managing the available time ultimately made the difference.
Why Australia’s Batting Failed Despite Head’s Century and Boland’s Resistance
Cummins acknowledged after the match that Australia had been well below its best.
“We just need more from all departments.”
That admission reflected the scoreboard.
Australia’s first innings lasted only 42.3 overs and produced 99 runs, despite Smith spending 88 balls at the crease and Renshaw facing 48.
The second innings was more substantial, but the improvement came primarily through Head’s 121 and Boland’s 40.
Labuschagne contributed 39 and Carey remained unbeaten on 37, yet Australia’s broader batting returns were insufficient.
Renshaw, who had dominated the first Test with 190 and 82, scored just 12 and 11 in Gqeberha.
Smith made 28 and three, while Maddinson managed a duck and eight.
Continue the Cricket Story
 CricketBavuma’s Heroic 179 Turns South Africa’s 92/5 Nightmare Into Australia’s 422-Run Problem
 CricketMarco Jansen Claims 5/33 as South Africa Enforce Follow-On, But Travis Head Keeps Australia Alive
 CricketOne Run Apart After 10 Overs, 55 at the Finish: Hoey Turns Namibia’s Promising Chase Into Ireland Victory
Webster contributed 13 and eight.
These were not merely isolated failures by individual batters.
South Africa repeatedly took wickets before Australia’s innings could develop around substantial partnerships, apart from the resistance provided by Head and Boland.
Cummins said the team needed to examine its performances across departments rather than reduce the defeat to questions of bowling balance alone.
The loss also reopens questions about selection before Cape Town.
Australia omitted Nathan Lyon in Gqeberha and relied on a seam-heavy attack with part-time spin options.
That arrangement initially worked brilliantly, but the side was unable to dismiss South Africa’s lower order before the total became imposing.
Australia’s batting concerns are even more immediate.
A repeat of the first-innings collapse in Cape Town could decide the series regardless of the bowling combination selected.
From Durban to Gqeberha: The Ruthlessness South Africa Finally Found
One of the most revealing aspects of the series is the way each Test has exposed a similar weakness in the losing team.
In Durban, South Africa reduced Australia to 124/6 but allowed Renshaw and the lower order to turn a potential collapse into a total of 390.
In Gqeberha, Australia reduced South Africa to 110/6 and then conceded another 315 runs.
Both matches demonstrate the dangers of failing to finish an innings after creating a dominant position.
The decisive difference was that South Africa learned to convert opportunities with the ball.
Once Jansen had Australia struggling, the Proteas kept attacking until the tourists were dismissed for 99.
Once the second innings entered its decisive final-day phase, Mulder and Rabada refused to let Head and Boland’s resistance become a match-saving effort.
Bavuma summarized the team’s philosophy in his post-match remarks:
“We play good old Test cricket, you know, try and wear the opposition down and then take them down when the opportunity presents itself.”
The comments are particularly interesting in the context of the wider debate about competitive intensity between Australia and South Africa.
The Sports Encounter previously explored whether modern cricketers have become too friendly and how competitive ruthlessness shapes major Test contests.
Gqeberha provided a clear answer about the importance of disciplined pressure.
South Africa did not need to rely on hostility or confrontation to defeat Australia.
It needed batters prepared to occupy the crease and bowlers capable of taking wickets when opportunities appeared.
From the 2025 World Test Championship Final to a Cape Town Decider
This victory also strengthens the larger significance of the rivalry.
South Africa defeated Australia in the 2025 World Test Championship final at Lord’s, establishing itself as the reigning champion of Test cricket’s international championship.
Australia then arrived in South Africa for its first Test series in the country since the controversial 2018 tour.
The historical backdrop, including the 2018 ball-tampering scandal and the subsequent development of both teams, was explored in The Sports Encounter’s comprehensive pre-series analysis.
The current series now stands at 1-1.
Australia dominated the opening Test in Durban. South Africa produced an equally commanding response in Gqeberha.
The third match will determine which side can sustain its best cricket when the pressure is greatest.
The teams will meet at Newlands in Cape Town from October 27 to 31, according to Cricket South Africa’s official 2026/27 home schedule.
For South Africa, the next challenge is maintaining its bowling intensity and preventing another top-order collapse.
For Australia, the immediate concerns are strengthening the batting, managing player fitness and deciding whether its bowling balance requires adjustment.
The next Test also carries implications for the 2025-27 World Test Championship, although the precise standings and qualification scenarios will depend on results elsewhere.
South Africa vs Australia Second Test: Frequently Asked Questions
Who Won the South Africa vs Australia Second Test in 2026?
South Africa won by an innings and 31 runs at St George’s Park in Gqeberha on October 22, 2026, leveling the three-match series 1-1.
Who Was Player of the Match?
South Africa captain Temba Bavuma won Player of the Match for his career-best 179 from 334 deliveries.
How Many Runs Did South Africa Score After Falling to 110/6?
South Africa added 315 runs after losing the sixth wicket, eventually declaring at 425/9. Marco Jansen scored 85 and Simon Harmer 82 in support of Bavuma.
What Were Marco Jansen’s Bowling Figures?
Jansen took 5/33 in Australia’s first innings and 1/34 in the second, finishing with six wickets for 67 runs.
Why Did Australia Have to Follow On?
Australia were dismissed for 99 in reply to South Africa’s 425/9 declared, leaving a first-innings deficit of 326 runs. South Africa enforced the follow-on.
How Many Runs Did Travis Head Score?
Head scored 121 from 190 balls in Australia’s second innings after making 14 in the first innings.
How Long Did Scott Boland Bat in the Second Innings?
Boland faced 166 deliveries over 187 minutes and scored 40 before being bowled by Wiaan Mulder.
Who Took the Most Wickets in the Match?
Kagiso Rabada and Marco Jansen each took six wickets, while Wiaan Mulder claimed five.
Why Did Anrich Nortje Not Bowl in Australia’s Second Innings?
Nortje left the field during the first innings with a suspected groin injury after bowling 3.3 overs and did not bowl again during the match. A definitive medical diagnosis was not established in the supplied scorecard.
When Is the Third South Africa vs Australia Test?
The third and deciding Test begins on October 27, 2026, at Newlands in Cape Town, with the match scheduled to conclude on October 31.
South Africa’s Victory Was Won Long Before the Final Wicket
The celebrations began when Jansen’s final delivery found Hazlewood’s outside edge and Markram completed the catch.
But the foundation of the victory had been laid much earlier.
It began with Bavuma refusing to surrender when South Africa were 110/6.
It grew through Jansen’s fearless 85 and Harmer’s patient 82.
It became a genuine match-winning position when Jansen reduced Australia to 99 all out.
And it was finally secured when Mulder, Rabada and Jansen ended the resistance of Head, Boland and Carey’s lower-order support.
Australia deserves credit for refusing to surrender easily in the second innings. Head’s century and Boland’s prolonged defense offered a reminder that Test matches can change even when one side appears to have secured an overwhelming advantage.
Yet South Africa never completely lost sight of what it needed to accomplish.
After losing most of the first two days to weather interruptions and the first session of the final day to wet conditions, the Proteas still found a way to complete an innings victory.
Bavuma’s 179 deserves its place among the defining innings of his career, but the wider achievement belongs to a team that recovered from a near-hopeless position and then refused to let Australia escape.
The series now moves to Cape Town with everything to play for.
And after two Tests that have swung dramatically between Australia’s domination and South Africa’s resilience, neither team can safely assume it has the advantage.