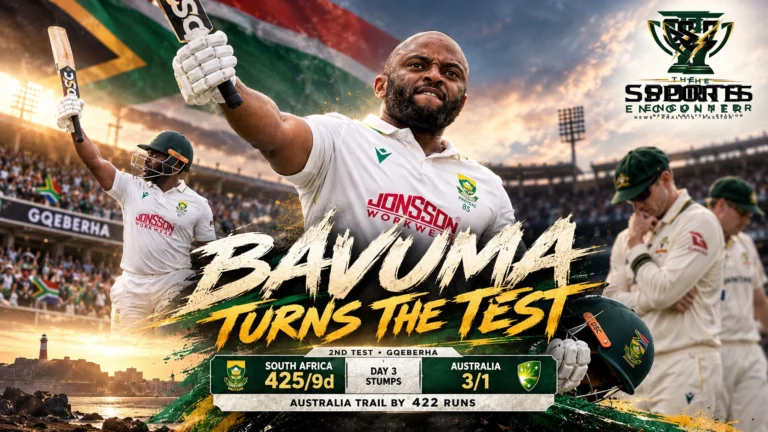
GQEBERHA, South Africa, October 20, 2026: Temba Bavuma had watched Australia escape from 124/6 and defeat South Africa by 214 runs in Durban. Nine days later, his own team was staring at another batting disaster, five wickets down for 92, when the captain produced an extraordinary answer. Bavuma’s career-best 179, supported by Marco Jansen’s counterattacking 85 and Simon Harmer’s remarkable 82, carried South Africa to 425/9 declared on Day 3 of the second Test at St George’s Park on Tuesday, October 20.
Australia, leading the three-match series 1-0, finished the third day at 3/1 after Kagiso Rabada dismissed Nic Maddinson for a duck in the opening over. The visitors trail by 422 runs with two scheduled days remaining, although rain has already taken substantial time out of the contest. South Africa’s revival featured a 132-run seventh-wicket partnership between Bavuma and Jansen, followed by 183 for the eighth wicket between the captain and Harmer. Those stands turned a threatened first-innings collapse into a position from which the reigning World Test Championship holders can realistically pursue a series-leveling victory.
South Africa vs Australia Second Test: Day 3 Score and Match Situation
| Match Detail | Information |
|---|---|
| Series | Australia Tour of South Africa 2026, Second Test |
| Competition | ICC World Test Championship 2025-27 |
| Venue | St George’s Park, Gqeberha |
| Dates | October 18-22, 2026 |
| Toss | Australia elected to field |
| South Africa, first innings | 425/9 declared, 127.1 overs |
| Australia, first innings | 3/1, 4 overs |
| Australia trail by | 422 runs |
| Top scorer | Temba Bavuma, 179 |
| Leading wicket-taker | Scott Boland, 5/81 |
| Series position | Australia lead 1-0 |
| Match status | Stumps, Day 3 |
Australia’s official second-Test match center provides live scorecard and match information.
From Durban’s Defeat to Gqeberha’s Rescue: Bavuma Answers His Biggest Test
There is a compelling reversal at the heart of this match.
Story at a glance

South Africa vs Australia Second Test: Day 3 Score and Match Situation
Australia’s official second-Test match center provides live scorecard and match information.
From Durban’s Defeat to Gqeberha’s Rescue: Bavuma Answers His Biggest Test
There is a compelling reversal at the heart of this match.
How Bavuma Built a Career-Best 179 Against Australia’s Fast Bowlers
Bavuma’s innings was an exercise in concentration, judgment and calculated aggression.
Marco Jansen’s 85 Turns a Defensive Partnership Into a Counterattack
When Wiaan Mulder departed for 13, South Africa were 110/6.
Simon Harmer’s 82 Produces the Partnership Australia Could Not Break
If Jansen’s innings was the first decisive rescue, Harmer’s was the contribution that made South Africa’s total imposing.
In Durban, South Africa reduced Australia to 124/6 before Matt Renshaw’s 190 changed the direction of the first Test. Australia recovered to 390, eventually winning by 214 runs and handing Bavuma his first defeat as South Africa’s Test captain.
That performance was examined in The Sports Encounter’s first-Test report on Renshaw and Josh Hazlewood’s match-winning contributions.
The second Test began with the possibility of a similar outcome.
Australia won the toss, chose to bowl on a seam-friendly surface and immediately put South Africa under pressure. Aiden Markram fell for 11, debutant Marques Ackerman for six and David Bedingham for a first-ball duck.
Matthew Breetzke managed only four. Ryan Rickelton made 31 before Scott Boland removed him, leaving South Africa at 92/5.
At that point, the hosts had scored fewer than 100 runs, lost half their batting lineup and were facing an Australian attack equipped to exploit helpful conditions.
Bavuma had arrived at 12/2 on the opening day. By the time South Africa lost their fifth wicket, his innings had already become their best chance of resisting Australia’s sustained pressure.
The broader series stakes had been established in TSE’s comprehensive South Africa-Australia Test series preview. Australia had returned to South Africa seeking to strengthen their World Test Championship position, while Bavuma’s team wanted to reassert the superiority it had demonstrated in the 2025 WTC final.
By Tuesday evening, the captain had made that rivalry intensely personal again.
How Bavuma Built a Career-Best 179 Against Australia’s Fast Bowlers
Bavuma’s innings was an exercise in concentration, judgment and calculated aggression.
He occupied the crease for 334 balls and 552 minutes, hitting 18 fours and one six at a strike rate of 53.59.
His first fifty took 140 deliveries. He needed 226 balls to reach his century and 299 to pass 150.
Those numbers reveal how carefully he constructed his innings. He refused to chase the scoring rate while Australia still had favorable bowling conditions and continued to leave deliveries outside off stump rather than offer the slips unnecessary opportunities.
Against a fast-bowling attack featuring Pat Cummins, Mitchell Starc, Josh Hazlewood and Boland, that discipline was as valuable as any attacking shot.
South Africa’s assistant coach Ashwell Prince had highlighted the importance of Bavuma’s judgment after the second day’s play, explaining that the captain was making exceptionally good decisions about which deliveries to play.
His most important adjustment was resisting the temptation to accelerate merely because wickets were falling at the other end.
The captain still had scoring options. He drove the fuller deliveries, played the short ball with increasing authority and became more assertive once the bowling attack began to tire.
The Fifth Test Century That Changed the Mood at St George’s Park
Bavuma’s century arrived after an extended spell in the 90s.
He eventually reached three figures with a boundary off Cummins, completing his fifth Test hundred and first against Australia.
It was an important personal achievement, but its value went far beyond the milestone.
South Africa had entered the third day at 97/5 after rain and interruptions had severely limited the opening two days. Bavuma resumed on 41 not out, with his team still in a vulnerable position.
By the time he reached 100, South Africa had moved from merely trying to survive toward establishing a commanding first-innings total.
His career-best score also marked a striking contrast with the opening Test, where he had fallen for one in the second innings. TSE’s analysis of Renshaw’s unexpected dismissal of Bavuma in Durban documented how damaging that earlier failure had been.
In Gqeberha, Bavuma spent more than nine hours demonstrating exactly what South Africa had missed.
Marco Jansen’s 85 Turns a Defensive Partnership Into a Counterattack
When Wiaan Mulder departed for 13, South Africa were 110/6.
Jansen joined Bavuma and immediately changed the tempo.
The tall left-hander scored 85 from 100 deliveries, striking nine fours and three sixes at a strike rate of 85. His half-century required only 43 balls.
While Bavuma continued to preserve his wicket, Jansen attacked scoring opportunities and prevented Australia’s bowlers from dictating every over.
The pair added 132 for the seventh wicket, advancing South Africa from 110/6 to 242/7.
Jansen’s contribution mattered because Bavuma did not have to carry the scoring burden alone. The partnership also forced Australia to defend against contrasting styles: one batter demanding patience and precision, the other threatening to punish any lapse in length.
Boland eventually removed Jansen for 85, with Travis Head taking the catch. Australia had broken the partnership, but the damage was substantial.
South Africa had already moved beyond 240, and Bavuma was approaching his century.
Jansen’s effectiveness against Australia was consistent with his role in the recent white-ball series, where his lower-order contributions helped South Africa maintain pressure. TSE examined that wider contest in its report on South Africa’s opening ODI victory over Australia.
Simon Harmer’s 82 Produces the Partnership Australia Could Not Break
If Jansen’s innings was the first decisive rescue, Harmer’s was the contribution that made South Africa’s total imposing.
Coming in at number nine, the off-spinner scored 82 from 157 balls, including ten fours and one six.
He and Bavuma added 183 runs for the eighth wicket, transforming the score from 242/7 to 425/8.
The partnership lasted long enough to frustrate Australia’s attempts to expose South Africa’s final two batters and brought Harmer his highest Test score.
It also forced Australia to operate deep into another difficult spell after the weather had already disrupted the first two days.
Harmer reached his half-century from 116 deliveries. He did not need to match Jansen’s aggression; his responsibility was to stay with Bavuma and take advantage of scoring opportunities without risking the partnership unnecessarily.
By the time Marnus Labuschagne bowled Harmer for 82, the hosts had reached 425.
South Africa’s seventh- and eighth-wicket partnerships had produced a combined 315 runs. That was almost three-quarters of the final team total.
Australia’s Fast-Bowling Selection: Why the Early Advantage Disappeared
Australia entered this Test without specialist spinner Nathan Lyon, choosing an attack dominated by pace bowling.
The decision initially appeared justified.
Boland’s movement and accuracy had helped South Africa collapse to 20/2 on the opening day, and he later finished with 5/81 from 29 overs.
Starc took three wickets for 89, including Bavuma’s eventual dismissal. Cummins bowled 26 overs without a wicket, conceding 96 runs, while Hazlewood finished with 0/43 from 14 overs.
The deeper problem was Australia’s inability to convert early control into a completed innings.
Hazlewood was unavailable to bowl during the first session of Day 3 because of illness. That reduced Australia’s available pace resources during an important period of the match.
Australia also missed a difficult opportunity when Steve Smith dropped a low, one-handed chance offered by Bavuma. The chance required attention to Smith’s finger afterward.
Neither incident alone explains the full recovery. Jansen’s aggressive scoring, Harmer’s concentration and Bavuma’s disciplined batting were central to the turnaround.
However, Hazlewood’s absence and the missed chance increased the demands on the remaining bowlers as the partnerships grew.
The selection choice was particularly revealing because Boland had returned to the side after a lengthy absence. TSE’s second-Test selection preview examined the changes made by both teams before the match.
Scott Boland’s Five Wickets Deserve More Than a Footnote
Australia’s difficult finish should not obscure Boland’s performance.
His figures of 5/81 included seven maidens and an economy rate of 2.79.
He removed Markram, Bedingham, Ackerman, Rickelton and Jansen. Four of those wickets came before South Africa reached 100, establishing Australia’s early advantage.
It was Boland’s third five-wicket haul in Test cricket.
The difference between his bowling figures and the final scoreboard illustrates the unusual course of the innings. Australia had enough wicket-taking success to leave South Africa in serious trouble, but Bavuma and the lower order absorbed that advantage.
Why Bavuma Declared at 425/9 Instead of Batting Longer
Bavuma’s dismissal came immediately after Harmer’s wicket, as Starc found the captain’s edge and Alex Carey completed the catch.
South Africa were 425/9 after 127.1 overs.
Rather than send Anrich Nortje to the crease, Bavuma declared, choosing to give his bowlers a short opportunity to attack Australia’s openers before the close.
The timing reflected a strategic calculation.
South Africa already had a substantial first-innings total, but the first two days had been heavily disrupted by rain. Further batting would consume valuable time in a match where the hosts still needed to take 20 Australian wickets to win.
The declaration therefore gave South Africa an immediate opportunity to use the remaining evening conditions.
It was a decision that carried risk: Australia would begin its innings knowing the target was to bat for time as well as runs. Yet the early result provided encouragement for Bavuma.
Kagiso Rabada Removes Maddinson for a Duck as Australia Reach 3/1
Rabada needed only four deliveries to make his return to the Test side felt.
He dismissed Nic Maddinson for a four-ball duck, with Harmer completing the catch. Australia were 0/1 in the opening over.
Travis Head and nightwatchman Scott Boland then survived until stumps.
Head finished unbeaten on one from seven balls. Boland made two from 13 deliveries.
Australia closed at 3/1 after four overs, trailing by 422 runs.
Rabada’s first over was a wicket maiden. Harmer bowled two overs for three runs, while Aiden Markram delivered a maiden.
The wicket was particularly significant because Rabada had missed the opening Test while recovering from a hamstring injury.
His return had been one of South Africa’s central selection stories before the match, as TSE reported in its preview of Rabada’s comeback and South Africa’s series predicament.
South Africa now have their premier fast bowler available to lead the attack, while Bavuma has supplied a substantial total for his bowlers to defend.
South Africa vs Australia Second Test: Complete Scorecard Through Day 3
South Africa First Innings: 425/9 Declared
| Batter | Dismissal | R | B | 4s | 6s | SR |
|---|---|---|---|---|---|---|
| Aiden Markram | b Boland | 11 | 28 | 2 | 0 | 39.28 |
| Marques Ackerman | c Carey b Boland | 6 | 38 | 0 | 0 | 15.78 |
| David Bedingham | c Carey b Boland | 0 | 1 | 0 | 0 | 0.00 |
| Temba Bavuma (c) | c Carey b Starc | 179 | 334 | 18 | 1 | 53.59 |
| Matthew Breetzke | c Carey b Starc | 4 | 17 | 0 | 0 | 23.52 |
| Ryan Rickelton (wk) | c Renshaw b Boland | 31 | 51 | 5 | 0 | 60.78 |
| Wiaan Mulder | c Renshaw b Starc | 13 | 38 | 1 | 0 | 34.21 |
| Marco Jansen | c Head b Boland | 85 | 100 | 9 | 3 | 85.00 |
| Simon Harmer | b Labuschagne | 82 | 157 | 10 | 1 | 52.22 |
| Kagiso Rabada | Not out | 0 | 0 | 0 | 0 | – |
| Anrich Nortje | Did not bat | – | – | – | – | – |
| Extras | 8 lb, 1 nb, 5 w | 14 | ||||
| Total | 127.1 overs | 425/9d | ||||
Fall of wickets: 12/1 (Markram, 8.4), 12/2 (Bedingham, 8.5), 25/3 (Ackerman, 14.3), 40/4 (Breetzke, 21.3), 92/5 (Rickelton, 39.4), 110/6 (Mulder, 49.6), 242/7 (Jansen, 80.5), 425/8 (Harmer, 126.6), 425/9 (Bavuma, 127.1).
Australia Bowling: South Africa First Innings
| Bowler | O | M | R | W | Econ |
|---|---|---|---|---|---|
| Mitchell Starc | 24.1 | 4 | 89 | 3 | 3.68 |
| Josh Hazlewood | 14 | 2 | 43 | 0 | 3.07 |
| Scott Boland | 29 | 7 | 81 | 5 | 2.79 |
| Pat Cummins | 26 | 3 | 96 | 0 | 3.69 |
| Beau Webster | 19 | 6 | 43 | 0 | 2.26 |
| Matt Renshaw | 8 | 1 | 33 | 0 | 4.12 |
| Nic Maddinson | 5 | 0 | 24 | 0 | 4.80 |
| Marnus Labuschagne | 2 | 0 | 8 | 1 | 4.00 |
Australia First Innings: 3/1 at Stumps
| Batter | Dismissal | R | B | 4s | 6s |
|---|---|---|---|---|---|
| Nic Maddinson | c Harmer b Rabada | 0 | 4 | 0 | 0 |
| Travis Head | Not out | 1 | 7 | 0 | 0 |
| Scott Boland | Not out | 2 | 13 | 0 | 0 |
| Extras | 0 | ||||
| Total | 4 overs | 3/1 | |||
Yet to bat: Marnus Labuschagne, Steve Smith, Matt Renshaw, Alex Carey, Beau Webster, Pat Cummins, Mitchell Starc, Josh Hazlewood.
Fall of wickets: 0/1 (Maddinson, 0.4 overs).
South Africa Bowling: Australia First Innings
| Bowler | O | M | R | W | Econ |
|---|---|---|---|---|---|
| Kagiso Rabada | 1 | 1 | 0 | 1 | 0.00 |
| Simon Harmer | 2 | 0 | 3 | 0 | 1.50 |
| Aiden Markram | 1 | 1 | 0 | 0 | 0.00 |
The Numbers Behind Bavuma’s Extraordinary Rescue
| Match Situation | What Followed | Why It Mattered |
|---|---|---|
| South Africa 12/2 | Bavuma anchors the innings | Early resistance against the new ball |
| South Africa 92/5 | 333 additional runs | Complete reversal of first-innings fortunes |
| South Africa 110/6 | Bavuma and Jansen add 132 | First major counterattack |
| South Africa 242/7 | Bavuma and Harmer add 183 | Lower-order partnership creates commanding total |
| Bavuma’s innings | 179 from 334 balls | Career-best score under sustained pressure |
| Final first-innings score | 425/9 declared | South Africa gains time to pursue 20 wickets |
| Australia after four overs | 3/1 | Early pressure on the visitors |
South Africa scored 333 runs after falling to 92/5. Bavuma contributed 179 of the final 425, or approximately 42.1 percent of the innings.
The combined seventh- and eighth-wicket partnerships added 315, approximately 74.1 percent of the final total.
These calculations illustrate why this innings deserves attention beyond the captain’s individual score. South Africa’s most productive partnerships came after six wickets had fallen.
Can South Africa Still Win After Losing So Much Time to Rain?
South Africa have created an opportunity, but victory is far from guaranteed.
Australia still have nine first-innings wickets remaining. Their immediate priorities will be to survive the new ball, establish partnerships and consume enough playing time to reduce South Africa’s chances of securing all 20 wickets.
Even if South Africa dismiss Australia cheaply, the hosts may have to decide whether to enforce the follow-on or bat again. That decision would depend on Australia’s first-innings total, available time, weather conditions and the workload of South Africa’s bowlers.
Continue the Cricket Story



A draw remains a realistic possibility because rain has already disrupted a substantial portion of the match.
The crucial question is whether Bavuma can translate the advantage created by his batting into sustained wicket-taking pressure.
That challenge echoes a theme from the opening Test. South Africa failed to complete the job when Australia were six wickets down for 124 in Durban. TSE examined the significance of that failure in its analysis of South Africa’s competitive approach and the changing character of the Australia rivalry.
Gqeberha now gives the hosts an immediate opportunity to demonstrate that they have learned from the defeat.
What Does Bavuma’s 179 Mean for the World Test Championship?
South Africa began the second Test trailing Australia 1-0 in the three-match series.
Australia’s opening-Test victory strengthened its position in the 2025-27 World Test Championship, while South Africa suffered a setback in its effort to reach another final.
A victory in Gqeberha would level the series 1-1 and give South Africa valuable championship points. A draw would leave Australia ahead entering the third Test in Cape Town.
The series carries additional significance because South Africa defeated Australia in the 2025 World Test Championship final at Lord’s.
The current contest therefore tests whether the defending champions can respond after Australia seized the early advantage in the rematch.
Bavuma has already supplied the necessary innings. Whether his bowlers can complete the recovery will determine its ultimate value.
South Africa vs Australia: Day 4 Preview and Key Questions
Can Rabada Make the New Ball Count?
Rabada’s opening-over dismissal of Maddinson gave South Africa an ideal start. His ability to create further chances early on Day 4 will be central to the hosts’ push for victory.
Will Australia Promote a More Conventional Batter After Boland?
Boland survived as nightwatchman, but Australia’s established middle order, including Labuschagne, Smith and Renshaw, will face the responsibility of protecting the innings once he departs.
How Much Will the Weather Affect the Remaining Two Days?
South Africa have already lost substantial playing time. Any further rain or bad light could increase the likelihood of a draw, regardless of the hosts’ position on the scoreboard.
What Will Australia’s Bowlers Take From the First Innings?
Boland’s five-wicket haul demonstrated the assistance available to disciplined pace bowling, but Australia’s failure to break the late partnerships also raised questions about workload, bowling variety and their ability to sustain pressure.
Can Bavuma Complete the Reversal of the Durban Result?
The captain has led the batting recovery. A win would restore parity before the final Test at Newlands from October 27.
South Africa vs Australia Second Test: Frequently Asked Questions
How many runs did Temba Bavuma score?
Bavuma scored a career-best 179 from 334 deliveries, hitting 18 fours and one six.
What was South Africa’s first-innings total?
South Africa declared at 425/9 after 127.1 overs.
How many runs did Marco Jansen score?
Jansen scored 85 from 100 balls, adding 132 runs with Bavuma for the seventh wicket.
How many runs did Simon Harmer score?
Harmer made 82 from 157 deliveries. He and Bavuma added 183 for the eighth wicket.
Who took five wickets for Australia?
Scott Boland finished with 5/81 from 29 overs.
What was Australia’s score at the end of Day 3?
Australia were 3/1 after four overs, trailing South Africa by 422 runs.
Who dismissed Nic Maddinson?
Kagiso Rabada removed Maddinson for a four-ball duck, with Simon Harmer taking the catch.
Why did South Africa declare at 425/9?
South Africa had established a substantial total and wanted time to attack Australia’s batters after rain interrupted much of the opening two days.
When does the second Test finish?
The five-day match is scheduled to finish on October 22, 2026, subject to weather and the possibility of an earlier result.
A Captain’s Response That Has Changed the Series Conversation
In Durban, South Africa had Australia in trouble and allowed the match to escape. In Gqeberha, Bavuma found himself confronting the same danger from the opposite side.
His answer was the finest Test innings of his career.
Jansen gave him the attacking support he needed. Harmer delivered the patience and resistance required to transform a recovery into a dominant first-innings total. Rabada then supplied the immediate breakthrough that justified the declaration.
Australia still have enough batting quality to frustrate South Africa, and the weather remains an obstacle. Bavuma’s 179 has not won the Test.
But it has fundamentally changed who is asking the questions. For two rain-disrupted days, Australia threatened to take complete control of the series. At stumps on the third, the visiting batters were facing a 422-run deficit, and Bavuma’s bowlers had two days to pursue the wickets that could bring South Africa level.
The captain has given his team the chance. The next challenge is to finish what his bat started.