KOLKATA, India, November 16, 2023: South Africa were 24/4.
Australia needed only 213.
Neither number told the truth about what was still coming.
David Miller first dragged South Africa out of a collapse that had threatened to end their semifinal before the afternoon had properly begun.
Story at a glance
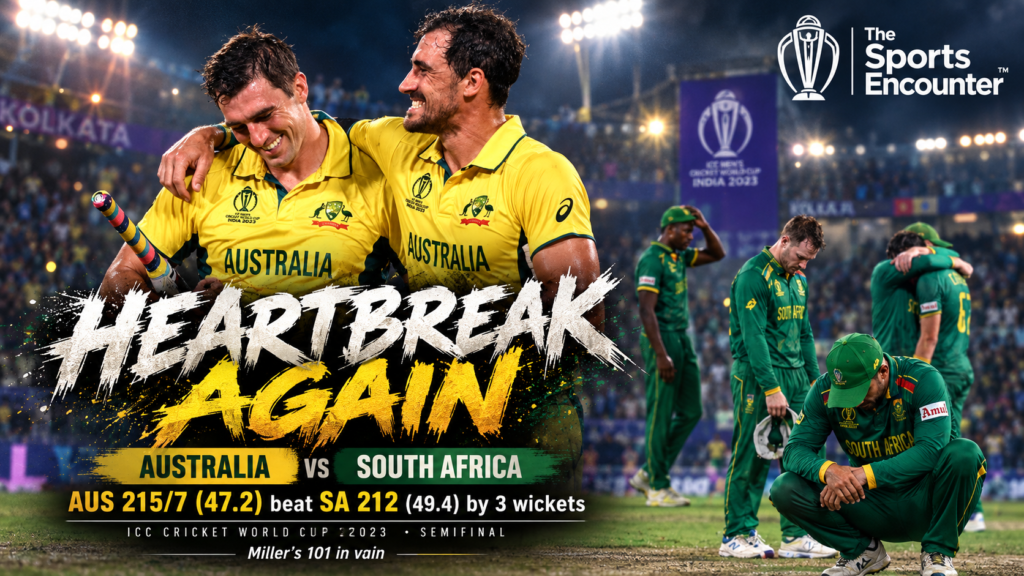
Why Match 43 Belongs in A Celebration of 5000 ODIs
The main A Celebration of 5000 ODIs roadmap selected this semifinal because both innings repeatedly appeared finished before changing direction.
Mitchell Starc Strikes Before South Africa Can Settle
South Africa chose to bat.
Josh Hazlewood Makes Scoring Almost Impossible
If Starc provided the initial aggression, Hazlewood supplied control.
Aiden Markram Falls and South Africa Reach 24/4
Markram attempted to counterattack.
David Miller Turns 24/4 Into a World Cup Semifinal
Miller’s innings deserves to be understood for what preceded it.
Heinrich Klaasen helped him rebuild.
Miller kept going after Klaasen fell.
He reached 101.
South Africa reached 212.
Then Australia began chasing.
David Warner attacked.
Travis Head attacked harder.
Australia raced to 60/0.
This looked finished again.
Then South Africa’s spinners arrived.
Warner fell.
Mitchell Marsh followed.
Head was bowled for 62.
Marnus Labuschagne and Glenn Maxwell disappeared.
Australia slipped to 137/5.
Suddenly 213 looked nothing like 213.
Steve Smith and Josh Inglis steadied the chase, but South Africa refused to disappear.
Smith fell.
Inglis fell.
Australia were 193/7.
Twenty runs remained.
South Africa needed three wickets.
Mitchell Starc and Pat Cummins stood between them and another World Cup semifinal heartbreak.
The two fast bowlers stayed.
Cummins eventually found the winning boundary.
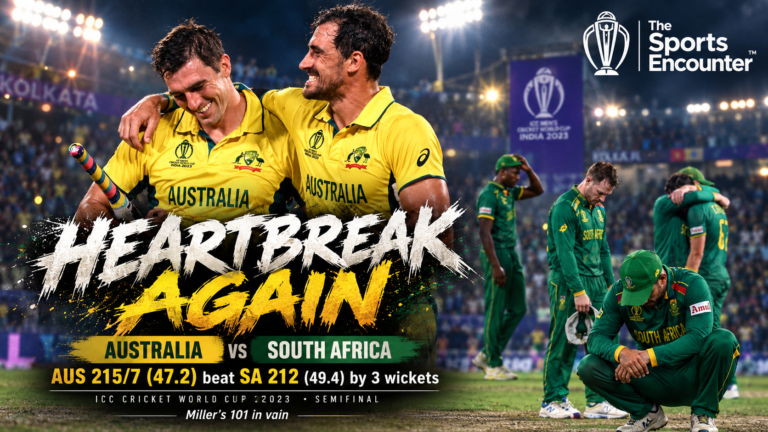
Australia 215/7.
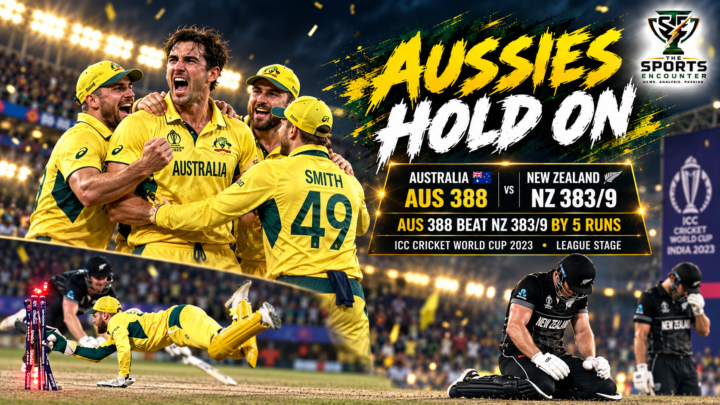
Victory by three wickets.
A place in the World Cup final.
South Africa eliminated again.
That is why this match is No. 43 in A Celebration of 5000 ODIs.
The scorecard looks modest beside the 771-run epic in Match 41 or Glenn Maxwell’s 201* in Match 42.
The tension was just as severe.
And for anyone who remembered 1999, one number made it almost impossible to ignore the history.
213.
Again.
TL;DR
- South Africa won the toss and chose to bat.
- South Africa collapsed to 24/4.
- Josh Hazlewood conceded only 12 runs in eight overs and took two wickets.
- Mitchell Starc took 3/34.
- David Miller scored 101 from 116 balls.
- Heinrich Klaasen made 47 from 48.
- Miller and Klaasen added 95 for the fifth wicket.
- Travis Head dismissed Klaasen and Marco Jansen in consecutive deliveries.
- South Africa were bowled out for 212 in 49.4 overs.
- Australia raced to 60/0.
- Travis Head scored 62 from 48 balls.
- South Africa’s spinners dragged Australia back into the match.
- Australia slipped from 106/2 to 137/5.
- Keshav Maharaj conceded only 24 runs in 10 overs.
- Tabraiz Shamsi took 2/42.
- Gerald Coetzee took 2/47.
- Australia lost their seventh wicket at 193.
- Mitchell Starc finished unbeaten on 16.
- Pat Cummins finished unbeaten on 14.
- Australia reached 215/7 in 47.2 overs.
- Australia won by three wickets with 16 balls remaining.
- Travis Head was named Player of the Match.
- Australia advanced to their eighth men’s ODI World Cup final.
Australia vs South Africa 2023 World Cup Semifinal: Match at a Glance
| Detail | Information |
|---|---|
| Competition | ICC Men’s Cricket World Cup 2023 |
| Stage | Second Semifinal |
| Date | November 16, 2023 |
| Venue | Eden Gardens, Kolkata |
| Toss | South Africa won and batted |
| South Africa | 212 all out in 49.4 overs |
| Australia | 215/7 in 47.2 overs |
| Result | Australia won by three wickets |
| Balls remaining | 16 |
| Player of the Match | Travis Head |
| South Africa top scorer | David Miller, 101 |
| Australia top scorer | Travis Head, 62 |
| Best Australia bowling | Mitchell Starc, 3/34 |
| Most economical Australia bowler | Josh Hazlewood, 2/12 |
| Best South Africa bowling | Tabraiz Shamsi, 2/42 |
| Key South Africa partnership | Miller and Klaasen, 95 |
| Australia’s late danger point | 193/7 |
| Winning pair | Mitchell Starc and Pat Cummins |
Why Match 43 Belongs in A Celebration of 5000 ODIs
The main A Celebration of 5000 ODIs roadmap selected this semifinal because both innings repeatedly appeared finished before changing direction.
South Africa were 24/4.
They made 212.
Australia were 60/0.
Then 137/5.
Then 174/6.
Then 193/7.
A small chase became a test of nerve.
That alone earns the match its place.
Then comes the historical layer.
Australia and South Africa had already produced perhaps the most famous semifinal in World Cup history in 1999.
Australia made 213 at Edgbaston.
South Africa also reached 213.
The match tied.
Australia advanced.
That extraordinary contest is revisited in Match 15: One Run, Two Stranded Batters and South Africa’s World Cup Collapse.
Twenty-four years later, South Africa made 212.
Australia’s target was therefore 213.
Again.
Different teams.
Different continent.
Different century.
The same number.
And again, Australia were the team that reached the World Cup final.
Mitchell Starc Strikes Before South Africa Can Settle
South Africa chose to bat.
Conditions immediately questioned the decision.
Starc found movement.
Temba Bavuma edged behind in the first over.
Duck.
South Africa 1/1.
Bavuma had already acknowledged before the match that he was not at full fitness.
Australia gave him no time to settle.
The semifinal had its first breakthrough after only six balls.
Josh Hazlewood Makes Scoring Almost Impossible
If Starc provided the initial aggression, Hazlewood supplied control.
His figures were extraordinary:
8 overs
3 maidens
12 runs
2 wickets
Economy: 1.50
He removed Quinton de Kock for three.
Later he dismissed Rassie van der Dussen for six.
Hazlewood’s spell did more than take wickets.
It removed scoring options.
South Africa’s top order became trapped between survival and an increasing number of dot balls.
That pressure helped Australia attack from both ends.
Aiden Markram Falls and South Africa Reach 24/4
Markram attempted to counterattack.
He made 10 from 20.
Starc removed him.
Van der Dussen soon followed Hazlewood.
South Africa were:
24/4 after 11.5 overs.
Bavuma gone.
De Kock gone.
Markram gone.
Van der Dussen gone.
Four of South Africa’s top four had collectively contributed 19 runs.
The semifinal appeared to be disappearing almost immediately.
Then Miller and Klaasen began rebuilding.
David Miller Turns 24/4 Into a World Cup Semifinal
Miller’s innings deserves to be understood for what preceded it.
He did not walk in with a platform.
He walked into damage.
South Africa still had almost 40 overs available, but Australia’s fast bowlers were dominating.
A reckless counterattack could have made it 40/6.
Miller chose patience first.
He absorbed pressure.
He waited for conditions to ease.
He accepted dot balls.
Then he began expanding his scoring range.
By the time Australia realized South Africa had escaped immediate danger, Miller was established.
Heinrich Klaasen Gives Miller the Partner South Africa Need
Klaasen scored:
47 from 48 balls
4 fours
2 sixes
Strike rate: 97.92
His role was crucial because Miller could not rebuild alone.
The pair added 95 runs for the fifth wicket.
South Africa moved from 24/4 to 119/4.
The semifinal changed.
Australia were still ahead.
South Africa were now alive.
Klaasen’s attack on Adam Zampa was particularly important.
Australia’s leg-spinner conceded 55 runs in seven overs, comfortably his most difficult spell of the knockout phase.
South Africa had finally found a bowler they could attack.
Travis Head Changes the Match With the Ball Before He Does It With the Bat
Pat Cummins turned to Head’s off-spin.
The move worked immediately.
Head bowled Klaasen for 47.
Next delivery, Marco Jansen was trapped lbw.
South Africa:
119/4
became
119/6.
Two balls.
Two wickets.
Australia had broken the partnership and removed the next batter before he could settle.
Head finished with:
5 overs
21 runs
2 wickets
Those figures become even more significant when combined with what he later did in the chase.
Gerald Coetzee Helps Miller Rebuild Again
South Africa had lost two wickets in two balls.
Miller had to start rebuilding again.
Coetzee offered support.
His 19 took 39 deliveries.
That pace hardly mattered.
Like Pat Cummins one match earlier alongside Maxwell, Coetzee’s job was partly survival.
He and Miller added 53.
South Africa moved to 172/6.
Australia still looked likely to restrict them below 200.
Miller kept finding enough boundaries to prevent that.
David Miller Reaches a Century Under Knockout Pressure
Miller brought up his hundred by launching Cummins for six.
It was an extraordinary innings:
101 runs
116 balls
8 fours
5 sixes
Strike rate: 87.07
Miller became the first South African to score a century in a men’s World Cup knockout match.
That achievement mattered because the rest of the top order had almost disappeared.
South Africa’s first four contributed 19.
Miller contributed 101.
Without him, the semifinal would probably have become a routine Australian chase before sunset.
Instead, he gave South Africa 212 to defend.
Pat Cummins Removes Miller Before the Final Surge
Two deliveries after reaching his hundred, Miller attacked again.
Head completed the catch.
Out for 101.
South Africa were 203/9.
The final wicket added nine.
Cummins removed Kagiso Rabada.
South Africa finished:
212 all out in 49.4 overs.
Not enough, according to conventional thinking.
Potentially enough, according to the history between these teams.
Complete Match Scorecard
South Africa Batting: 212 All Out in 49.4 Overs
| Batter | Dismissal | R | B | 4s | 6s | SR |
|---|---|---|---|---|---|---|
| Temba Bavuma (c) | c Josh Inglis b Mitchell Starc | 0 | 4 | 0 | 0 | 0.00 |
| Quinton de Kock (wk) | c Pat Cummins b Josh Hazlewood | 3 | 14 | 0 | 0 | 21.43 |
| Rassie van der Dussen | c Steve Smith b Josh Hazlewood | 6 | 31 | 0 | 0 | 19.35 |
| Aiden Markram | c David Warner b Mitchell Starc | 10 | 20 | 2 | 0 | 50.00 |
| Heinrich Klaasen | b Travis Head | 47 | 48 | 4 | 2 | 97.92 |
| David Miller | c Travis Head b Pat Cummins | 101 | 116 | 8 | 5 | 87.07 |
| Marco Jansen | lbw b Travis Head | 0 | 1 | 0 | 0 | 0.00 |
| Gerald Coetzee | c Josh Inglis b Pat Cummins | 19 | 39 | 2 | 0 | 48.72 |
| Keshav Maharaj | c Steve Smith b Mitchell Starc | 4 | 8 | 0 | 0 | 50.00 |
| Kagiso Rabada | c Glenn Maxwell b Pat Cummins | 10 | 12 | 0 | 1 | 83.33 |
| Tabraiz Shamsi | not out | 1 | 5 | 0 | 0 | 20.00 |
Extras: 11 (4 leg byes, 7 wides)
Total: 212 all out in 49.4 overs
Run rate: 4.27
Fall of wickets: 1/1 Bavuma (0.6), 8/2 de Kock (5.4), 22/3 Markram (10.5), 24/4 van der Dussen (11.5), 119/5 Klaasen (30.4), 119/6 Jansen (30.5), 172/7 Coetzee (43.3), 191/8 Maharaj (46.2), 203/9 Miller (47.2), 212/10 Rabada (49.4).
Australia Bowling
| Bowler | O | M | R | W | Econ |
|---|---|---|---|---|---|
| Mitchell Starc | 10 | 1 | 34 | 3 | 3.40 |
| Josh Hazlewood | 8 | 3 | 12 | 2 | 1.50 |
| Pat Cummins | 9.4 | 0 | 51 | 3 | 5.27 |
| Adam Zampa | 7 | 0 | 55 | 0 | 7.86 |
| Glenn Maxwell | 10 | 0 | 35 | 0 | 3.50 |
| Travis Head | 5 | 0 | 21 | 2 | 4.20 |
Australia Start the Chase as if 213 Will Be Easy
Warner and Head immediately attacked.
South Africa’s new-ball bowlers could not reproduce the control Starc and Hazlewood had found.
Warner smashed 29 from 18 balls.
Head attacked at an even greater scale.
Australia reached 60 without loss in only 6.1 overs.
A target of 213 had already been reduced to 153.
Ten wickets remained.
South Africa looked finished for the third time in the match.
Then Aiden Markram produced the breakthrough.
David Warner Falls but Australia Keep Attacking
Markram bowled Warner for 29.
Australia 60/1.
Kagiso Rabada then removed Mitchell Marsh for a six-ball duck.
Australia 61/2.
Two wickets had arrived quickly.
Head ignored the warning.
He continued attacking.
That aggression ultimately earned him Player of the Match.
It also created the platform Australia needed when the chase later slowed dramatically.
Player of the Match Travis Head Makes 62 Before Maharaj Stops Him
Head scored:
62 runs
48 balls
9 fours
2 sixes
Strike rate: 129.17
Those numbers were decisive in a chase of only 213.
Head effectively removed more than a quarter of the target himself while the field was up.
His innings meant Australia could survive the middle-over slowdown that followed.
Then Maharaj produced a brilliant delivery.
Head was bowled.
Australia were 106/3.
The chase changed instantly.
Keshav Maharaj Gives South Africa Control
Maharaj’s spell was exceptional:
10 overs
24 runs
1 wicket
Economy: 2.40
His value exceeded the single wicket.
He removed Head, Australia’s most dangerous batter.
Then he squeezed the middle overs.
Singles became harder.
Boundaries disappeared.
The required rate was still modest, but the match became increasingly psychological.
Every dot ball reminded Australia of the stakes.
Every wicket made South Africa believe.
Tabraiz Shamsi Removes Labuschagne and Maxwell
Shamsi became the attacking partner South Africa needed.
First he trapped Labuschagne lbw for 18.
Australia 133/4.
Then came the bigger blow.
Glenn Maxwell, the man who had produced the impossible 201* against Afghanistan in Match 42, lasted only five balls.
Shamsi bowled him for one.
Australia:
137/5.
The chase that began at 60/0 was suddenly uncomfortable.
South Africa had a route.
Australia’s 213 Starts Looking Like South Africa’s 213 From 1999
This was the stage where history became impossible to ignore.
The 1999 semifinal had finished tied at 213.
South Africa had needed one run.
They could not complete it.
In Kolkata, Australia were now chasing 213.
Five wickets were down.
South Africa’s spinners had control.
A generation of South African World Cup history appeared to be sitting beside them in the stadium.
The match was no longer about a small target.
It was about whether South Africa could finish.
Steve Smith Slows Everything Down
Smith made:
30 from 62 balls
Two fours.
Strike rate: 48.39
That innings will never dominate highlight packages.
Its importance was substantial.
Australia did not need another Head.
They needed someone to stop the collapse.
Smith did.
He and Josh Inglis moved the score from 137/5 to 174/5.
The required target became 39.
The match began drifting back toward Australia.
Then Gerald Coetzee intervened.
Gerald Coetzee Removes Smith and Reopens the Semifinal
Smith attempted to attack Coetzee.
The ball went high.
Quinton de Kock completed the catch.
Australia 174/6.
Thirty-nine required.
Four wickets remaining.
South Africa still had life.
Inglis continued nudging Australia closer.
Then Coetzee struck again.
Josh Inglis Falls With 20 Still Needed
Inglis had made 28 from 49 balls.
Three fours.
His innings had helped Smith stabilize the chase.
Coetzee bowled him.
Australia:
193/7.
Twenty needed.
Three wickets left.
Starc at the crease.
Cummins joining him.
South Africa had spent almost the entire day recovering from positions where the match looked finished.
Now they were three wickets from a World Cup final.
Mitchell Starc and Pat Cummins Refuse South Africa the Final Breakthrough
Starc finished unbeaten on:
16 from 38 balls
Cummins finished unbeaten on:
14 from 29
Neither innings was elegant.
Neither needed to be.
They understood the equation.
South Africa needed wickets.
Australia only needed runs eventually.
Starc and Cummins therefore removed unnecessary risk.
They defended.
They waited.
They accepted dot balls.
The target crept closer.
South Africa’s fielders searched for one opening.
It never arrived.
Pat Cummins Hits the Winning Runs
With the scores level, Marco Jansen bowled to Cummins.
Australia’s captain found the boundary.
Game over.
Australia:
215/7 in 47.2 overs.
Victory by three wickets.
Sixteen balls remaining.
The numerical margin makes the finish sound more comfortable than it felt.
The final 20 runs had carried all the psychological weight of a knockout match between two teams with one of cricket’s most complicated World Cup histories.
Australia survived.
South Africa did not.
Complete Australia Scorecard
Australia Batting: 215/7 in 47.2 Overs
| Batter | Dismissal | R | B | 4s | 6s | SR |
|---|---|---|---|---|---|---|
| David Warner | b Aiden Markram | 29 | 18 | 1 | 4 | 161.11 |
| Travis Head | b Keshav Maharaj | 62 | 48 | 9 | 2 | 129.17 |
| Mitchell Marsh | c Rassie van der Dussen b Kagiso Rabada | 0 | 6 | 0 | 0 | 0.00 |
| Steve Smith | c Quinton de Kock b Gerald Coetzee | 30 | 62 | 2 | 0 | 48.39 |
| Marnus Labuschagne | lbw b Tabraiz Shamsi | 18 | 31 | 2 | 0 | 58.06 |
| Glenn Maxwell | b Tabraiz Shamsi | 1 | 5 | 0 | 0 | 20.00 |
| Josh Inglis | b Gerald Coetzee | 28 | 49 | 3 | 0 | 57.14 |
| Mitchell Starc | not out | 16 | 38 | 2 | 0 | 42.11 |
| Pat Cummins (c) | not out | 14 | 29 | 2 | 0 | 48.28 |
Did not bat: Adam Zampa, Josh Hazlewood
Extras: 17 (3 leg byes, 12 wides, 2 no-balls)
Total: 215/7 in 47.2 overs
Run rate: 4.54
Fall of wickets: 60/1 Warner (6.1), 61/2 Marsh (7.4), 106/3 Head (14.1), 133/4 Labuschagne (21.5), 137/5 Maxwell (23.4), 174/6 Smith (33.3), 193/7 Inglis (39.5).
South Africa Bowling
| Bowler | O | M | R | W | Econ |
|---|---|---|---|---|---|
| Marco Jansen | 4.2 | 0 | 35 | 0 | 8.08 |
| Kagiso Rabada | 6 | 0 | 41 | 1 | 6.83 |
| Aiden Markram | 8 | 1 | 23 | 1 | 2.88 |
| Gerald Coetzee | 9 | 0 | 47 | 2 | 5.22 |
| Tabraiz Shamsi | 10 | 0 | 42 | 2 | 4.20 |
| Keshav Maharaj | 10 | 0 | 24 | 1 | 2.40 |
Eight Turning Points That Decided the Semifinal
1. South Africa Collapse to 24/4
Starc and Hazlewood removed the top order before South Africa could build any rhythm.
The semifinal looked nearly finished.
2. Miller and Klaasen Add 95
South Africa moved from collapse to competition.
Without this partnership, Australia probably chase fewer than 150.
3. Head Removes Klaasen and Jansen in Consecutive Balls
Australia broke the partnership and immediately exposed South Africa’s lower order.
4. Miller Reaches 101
His century lifted South Africa to 212 and gave the bowlers something meaningful to defend.
5. Warner and Head Take Australia to 60/0
Australia nearly removed the tension from the chase before South Africa could establish pressure.
6. Maharaj and Shamsi Reduce Australia to 137/5
The target had fallen dramatically, but Australia had also lost half their side.
The semifinal reopened.
7. Coetzee Removes Smith and Inglis
Those two wickets pushed the chase into Australia’s bowling all-rounders.
At 193/7, South Africa were still alive.
8. Starc and Cummins Survive the Final 20 Runs
South Africa never found the eighth wicket.
Australia’s fast bowlers finished the job with the bat.
Travis Head Wins Player of the Match Through Two Different Roles
Head’s award was fully deserved.
His 62 was Australia’s only half-century.
It came at a strike rate above 129 in a chase where almost everyone else struggled.
But Head had already influenced the match before opening the batting.
His 2/21 included Klaasen and Jansen in consecutive deliveries.
Those wickets stopped South Africa’s strongest partnership exactly when it was beginning to threaten Australia.
Head therefore changed both innings.
That is the defining reason he was Player of the Match.
David Miller’s 101 Deserved a World Cup Final
Miller’s century remains the great losing performance of the semifinal.
South Africa were 24/4.
He made 101.
The other 10 batters combined for 100, excluding extras.
He negotiated Starc.
He survived Hazlewood.
He rebuilt with Klaasen.
He rebuilt again with Coetzee.
Then he accelerated strongly enough to give South Africa 212.
That total nearly became enough.
Miller could not control what happened during Australia’s chase.
His own job had been completed.
South Africa had a semifinal to defend only because he created one.
Josh Hazlewood’s 2/12 Was Almost as Important as Starc’s Three Wickets
Starc took more wickets.
Hazlewood arguably created more pressure.
His eight overs cost only 12 runs.
Three were maidens.
He conceded one boundary.
That spell forced South Africa to spend the opening phase merely trying to survive.
Dot balls created desperation.
Desperation created mistakes.
Australia’s new-ball attack did not simply take four early wickets.
It denied South Africa any chance to counterattack while losing them.
South Africa Nearly Turn Spin Into the Match-Winning Weapon
Maharaj, Shamsi and Markram were outstanding.
Combined:
28 overs
89 runs
4 wickets
Maharaj conceded 24 from 10.
Markram conceded 23 from eight.
Shamsi took two wickets.
Once Australia’s powerplay assault ended, South Africa discovered exactly how to make 213 look difficult.
They slowed the pitch down.
They attacked the stumps.
They forced Australia’s batters to manufacture momentum.
That strategy nearly worked.
The problem was that 212 left almost no margin for one bad phase.
Australia’s first six overs had already taken too much out of the target.
South Africa’s Top Order Left Miller With Too Much to Repair
The deeper reason for defeat sits at 24/4.
South Africa’s top four scored:
- Bavuma: 0
- de Kock: 3
- van der Dussen: 6
- Markram: 10
Total: 19
Miller and Klaasen performed an extraordinary repair job.
That should not obscure the damage.
Had South Africa found even another 25 or 30 runs from the top four, their spinners probably would have been defending enough.
The match was not lost only during Australia’s chase.
It was also lost during the first 12 overs of South Africa’s innings.
South Africa’s World Cup Semifinal History Adds Another Painful Chapter
South Africa’s World Cup story already contained several matches in which opportunity turned into heartbreak.
The most obvious comparison is Match 15, the 1999 semifinal tie against Australia.
Then came 2015.
Grant Elliott’s six off Dale Steyn ended South Africa’s campaign in Auckland, revisited in Match 29: Elliott’s Six Breaks New Zealand’s Semifinal Barrier and South African Hearts.
At the 2019 World Cup, Kane Williamson again denied South Africa in a close contest covered in Match 35.
Kolkata was different in one important respect.
South Africa were not passive victims of another collapse.
They fought back twice.
From 24/4 with the bat.
From 60/0 with the ball.
They made Australia earn the final.
That may make the defeat more respectable.
It does not make it less painful.
Quinton de Kock’s ODI Career Ends in a Semifinal Defeat
The match also marked the end of Quinton de Kock’s ODI career.
He had been one of South Africa’s dominant performers throughout the tournament, scoring four centuries during the league stage.
His final ODI innings lasted 14 balls.
Three runs.
Hazlewood dismissed him.
A campaign full of prolific scoring ended with a low score and another South African semifinal loss.
It was a particularly sharp reminder of how little a knockout match cares about everything that came before it.
Australia Reach an Eighth Men’s World Cup Final
Australia’s reward was enormous.
They advanced to face India in Ahmedabad.
It was their eighth men’s ODI World Cup final after appearances in 1975, 1987, 1996, 1999, 2003, 2007 and 2015.
The path there had been anything but smooth.
Australia opened the tournament with two defeats.
They then rebuilt their campaign.
They survived New Zealand by five runs in Match 41.
They escaped Afghanistan from 91/7 through Maxwell in Match 42.
Then they survived South Africa.
By the time Australia reached Ahmedabad, they had spent much of the tournament learning how not to lose.
That quality would matter one more time.
The 213 Echo With 1999 Is Almost Too Perfect
The symmetry is one of the reasons Match 43 feels larger than a routine semifinal.
In 1999:
Australia 213.
South Africa needed 214.
The match tied at 213.
Australia advanced.
In 2023:
South Africa 212.
Australia needed 213.
Australia reached it.
Again, South Africa were eliminated.
The score cannot explain either match.
But it ties two generations of World Cup history together in a way sport rarely produces so neatly.
For readers following this series chronologically, Match 15 and Match 43 should almost be read as companion pieces.
Twenty-four years apart.
Same opponents.
Same stage.
Same pressure.
Nearly the same number.
Same finalist.
Continue A Celebration of 5000 ODIs
 A Celebration of 5000 ODIsA Celebration of 5000 ODIs Match 40: Maharaj Saves South Africa After Pakistan Turn 271 Into a One-Wicket World Cup Trap
 A Celebration of 5000 ODIsA Celebration of 5000 ODIs Match 37: Coulter-Nile Rises From No. 8 as Australia Escape 38/4 and Starc Breaks West Indies Late
 A Celebration of 5000 ODIsA Celebration of 5000 ODIs Match 35: Williamson Holds His Nerve as South Africa Let Another World Cup Escape Slip Away
Frequently Asked Questions
Who won Australia vs South Africa in the 2023 World Cup semifinal?
Australia won by three wickets, reaching 215/7 in 47.2 overs after bowling South Africa out for 212.
Who was Player of the Match?
Travis Head was Player of the Match after scoring 62 from 48 balls and taking 2/21.
How did South Africa recover from 24/4?
David Miller and Heinrich Klaasen added 95 for the fifth wicket. Miller later continued with Gerald Coetzee and scored 101.
How many did David Miller score?
Miller scored 101 from 116 balls with eight fours and five sixes.
Who was Australia’s best bowler?
Mitchell Starc took 3/34, while Josh Hazlewood produced the most economical spell with 2/12 from eight overs.
Why did Australia struggle chasing only 213?
South Africa’s spinners dramatically slowed the chase. Maharaj conceded only 24 from 10 overs, while Shamsi took two wickets and Australia fell from 106/2 to 137/5.
Who finished the chase for Australia?
Mitchell Starc made an unbeaten 16 and Pat Cummins finished 14 not out.
What was significant about David Miller’s century?
Miller became the first South African batter to score a century in a men’s World Cup knockout match.
Was this Quinton de Kock’s final ODI?
Yes. The semifinal was de Kock’s final One-Day International.
Why is Match 43 included in A Celebration of 5000 ODIs?
South Africa recovered from 24/4 to make 212, Australia then turned a small chase into a tense knockout battle, and Starc and Cummins eventually survived with only three wickets remaining. The match also carried remarkable historical echoes of the 1999 Australia-South Africa semifinal.
Australia
- A Celebration of 5000 ODIs Match 43: Miller Rescues South Africa From 24/4 Before Australia Survive Another Semifinal Thriller
- A Celebration of 5000 ODIs Match 42: Maxwell Rises From 91/7 to Drag Australia Past Afghanistan With an Unbelievable 201*
- A Celebration of 5000 ODIs Match 41: Head’s Return Ignites 771-Run Epic Before Australia Survive Ravindra and Neesham by Five Runs
- Australia Cup Final: South Melbourne’s Historic Run Meets Melbourne Victory’s Cup Pedigree at AAMI Park
- Carey and Marsh Put Australia Ahead of the Rain as South Africa’s Sweep Bid Ends on a Soggy Night