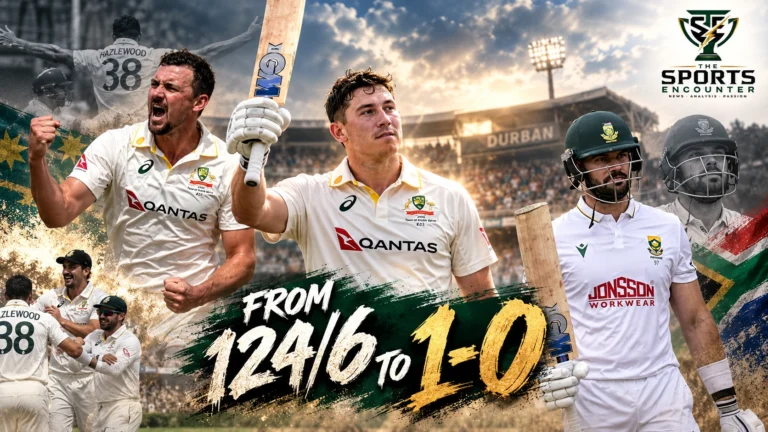
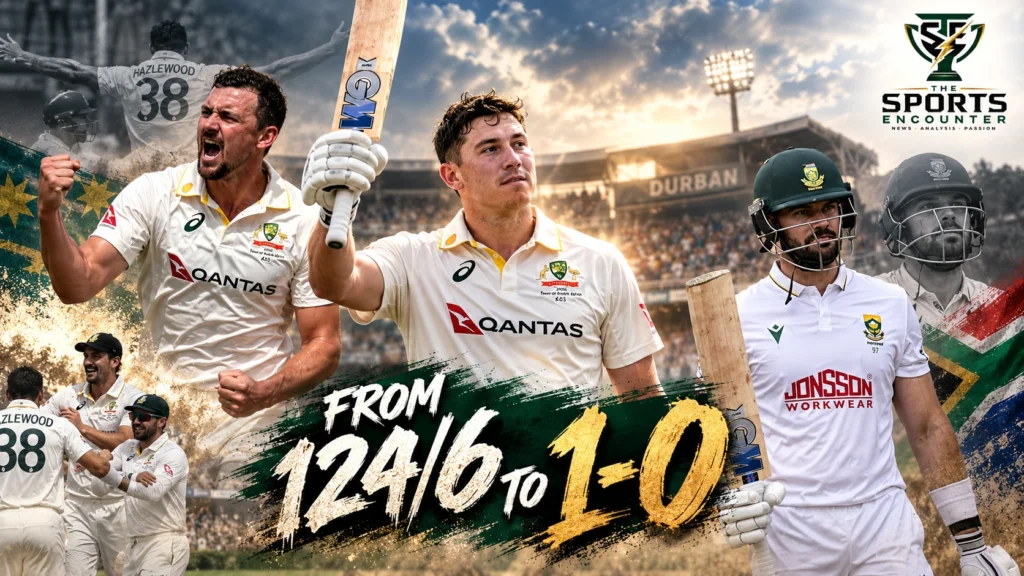
DURBAN, South Africa, October 13, 2026: Australia were 124/6, South Africa could almost see the finish line, and Matt Renshaw had other ideas. Five days later, Josh Hazlewood was celebrating career-best figures of 6/49 as Australia completed a remarkable turnaround to beat the defending World Test Championship champions by 214 runs at Kingsmead on Tuesday. Renshaw’s career-best 190, followed by 82 and two wickets, transformed the first Test of the three-match series before Hazlewood demolished South Africa’s lower order to give Pat Cummins’ side a 1-0 lead.
South Africa resumed the final morning at 102/4, chasing 421, with Aiden Markram attempting to save the Test. His determined 75 from 237 deliveries and Wiaan Mulder’s 110-ball resistance briefly frustrated Australia, but Hazlewood broke their partnership and returned with the second new ball to finish the job. Nathan Lyon contributed a wicketless but economical spell, Renshaw added Kyle Verreynne to his earlier dismissal of captain Temba Bavuma, and Mitchell Starc ended Markram’s vigil. South Africa were all out for 206 in 86.5 overs, suffering their first Test defeat under Bavuma and surrendering valuable World Test Championship ground before the series moves to Gqeberha.
South Africa vs Australia First Test 2026: Final Score and Match Summary
Australia won the toss and elected to bat in the opening Test at Kingsmead, played from October 9 to 13.
| Match Detail | Information |
|---|---|
| Series | Australia Tour of South Africa, 2026/27 |
| Competition | ICC World Test Championship 2025-27 |
| Venue | Kingsmead, Durban, South Africa |
| Toss | Australia won and elected to bat |
| Australia First Innings | 390 all out (137.2 overs) |
| South Africa First Innings | 284 all out (78 overs) |
| Australia Second Innings | 314/6 declared (58 overs) |
| South Africa Second Innings | 206 all out (86.5 overs) |
| Target | 421 runs |
| Result | Australia won by 214 runs |
| Player of the Match | Matt Renshaw: 190, 82 and 2/30 |
| Best Bowling | Josh Hazlewood: 6/49 in South Africa’s second innings |
| Series Position | Australia lead 1-0 |
| WTC Match Points | Australia 12, South Africa 0 |
The margin was convincing, but it conceals how different the match appeared on the opening afternoon.
Story at a glance
South Africa vs Australia First Test 2026: Final Score and Match Summary
Australia won the toss and elected to bat in the opening Test at Kingsmead, played from October 9 to 13.
Matt Renshaw’s 272 Runs Changed the Test Before Hazlewood Could Win It
Hazlewood delivered the final blows, but Renshaw was responsible for transforming Australia’s position earlier in the match.
South Africa’s Biggest Mistake: Letting Australia Add 266 After 124/6
The decisive statistical finding is not simply Renshaw’s 190.
South Africa’s Two-Spinner Selection Failed to Contain Renshaw
South Africa selected Keshav Maharaj and Simon Harmer together, anticipating that spin could become increasingly valuable as the Test progressed.
South Africa’s First Innings: Seven Useful Starts, No Half-Century
South Africa’s batting response contained another important reason for the eventual defeat.
South Africa had taken six wickets for 124. Australia then added 266 runs with their remaining four wickets, reaching 390 and building the foundation for a victory that looked remote when Beau Webster became the sixth batter dismissed.
That recovery explains the result more convincingly than the final margin alone.
Day 5: Hazlewood Ends Markram’s Resistance and Completes His Career-Best Six-For
Markram and Mulder Begin the Final Day With Survival in Mind
South Africa faced an extremely difficult assignment when play resumed on Tuesday.
They were 102/4 after 41 overs, still requiring another 319 runs for victory.
With six wickets remaining, chasing the target was theoretically possible but an increasingly remote proposition.
For Markram and Mulder, the practical challenge was to defend, occupy time and frustrate Australia’s bowlers.
Markram resumed on 45, while Mulder began the morning on five.
The pair initially accomplished what South Africa required.
Australia attacked, but the batters refused to give away their wickets.
Markram reached his half-century from 129 balls, demonstrating the patience required to withstand prolonged Test bowling.
Mulder concentrated on leaving deliveries, defending accurately and collecting the occasional boundary.
The partnership eventually reached 69 runs, carrying South Africa from 86/4 to 155/5.
For a while, it looked as though the hosts might force Australia to work considerably longer for the result.
Hazlewood’s Reverse Swing Finally Removes Mulder
The breakthrough arrived at 66.4 overs.
Hazlewood dismissed Mulder for 29 from 110 balls, with wicketkeeper Alex Carey completing the catch.
The dismissal ended a partnership that had consumed 34 overs and forced Australia to maintain sustained pressure.
Hazlewood’s ability to use the older ball was important.
He is widely associated with accuracy, disciplined seam bowling and consistent lengths, but the movement he generated as the ball aged added another dimension to his performance.
By finding reverse swing without surrendering control, Hazlewood challenged a batter who had spent more than two hours trying to occupy the crease.
South Africa were 155/5.
Renshaw then dismissed Kyle Verreynne for one at 156/6, with Steve Smith taking the catch.
That was Renshaw’s second wicket of the innings and his second Test wicket overall.
South Africa reached lunch at 166/6 after 73 overs.
They had consumed much of the morning, but Australia were four wickets away.
Markram and Jansen Offer One Last Challenge
Marco Jansen provided the most aggressive contribution to South Africa’s late resistance.
He scored 35 from 54 deliveries, striking six fours and a six.
Markram continued defending at the other end, carefully choosing scoring opportunities rather than attempting a desperate chase.
The pair added 45 runs for the seventh wicket, carrying the score to 201/6.
Australia had to maintain patience.
Markram’s survival meant a substantial partnership could still delay the result, while Jansen’s willingness to attack prevented the bowlers from settling entirely into a defensive field.
Then Australia took the second new ball at 81.2 overs.
The final phase of the match changed dramatically.
Four Wickets for Five Runs: South Africa’s Last Resistance Disappears
Hazlewood bowled Jansen for 35 at 84.2 overs, ending the seventh-wicket partnership.
Three deliveries later, he removed Simon Harmer for a duck, caught by Carey.
South Africa were 201/8.
Markram remained at the crease, but the situation had become increasingly hopeless.
Mitchell Starc then dismissed him for 75 from 237 deliveries at 85.5 overs, with Carey taking another catch.
Markram had batted for 358 minutes, striking 10 boundaries during a prolonged effort to save the Test.
His dismissal left the hosts 201/9.
Hazlewood completed the victory when Anrich Nortje, attempting to pull a short delivery, offered a catch to Nathan Lyon.
Nortje made four.
South Africa were all out for 206 after 86.5 overs.
They had lost their final four wickets for five runs.
Hazlewood finished with 6/49 from 16.5 overs, his best figures in a Test innings.
It was a devastating conclusion to a contest that South Africa had once controlled.
The ICC’s official report on Australia’s Durban victory confirms Hazlewood’s six-wicket performance, Markram’s resistance and the final 214-run margin.
Matt Renshaw’s 272 Runs Changed the Test Before Hazlewood Could Win It
Hazlewood delivered the final blows, but Renshaw was responsible for transforming Australia’s position earlier in the match.
His overall contribution was exceptional.
| Contribution | Performance |
|---|---|
| First-Innings Runs | 190 from 397 balls |
| Second-Innings Runs | 82 from 99 balls |
| Combined Runs | 272 |
| First-Innings Boundaries | 21 fours, 1 six |
| Second-Innings Boundaries | 7 fours, 2 sixes |
| Second-Innings Bowling | 2/30 from 13 overs |
| Wickets | Temba Bavuma and Kyle Verreynne |
| Award | Player of the Match |
From Opening Contender to Australia’s Most Important Middle-Order Batter
Renshaw entered the series facing considerable uncertainty about his place in the Australian batting lineup.
He had spent much of his Test career as an opening batter, but Australia’s selection changes placed him at No. 5 in Durban.
Nic Maddinson returned as an opener following injuries affecting Australia’s batting options, including Cameron Green and Josh Inglis.
Maddinson’s selection attracted attention because he had not played a Test since 2016.
The first innings did little to ease those concerns.
Maddinson faced 33 balls without scoring, while Travis Head made nine.
Marnus Labuschagne added 37, but Steve Smith fell for 25.
Australia were 84/4.
When Alex Carey and Beau Webster departed, the visitors were 124/6.
Renshaw was left to rebuild alongside the lower order.
The circumstances resembled the kind of middle-order crisis that Australia historically relied on established batters to solve.
There had already been questions about whether Australia’s aging Test squad possessed enough players capable of replacing the resilience of its senior generation.
Those concerns were examined in The Sports Encounter’s analysis of Australia’s aging squad and the challenge facing its next generation.
Renshaw’s performance provided an unusually convincing answer to one part of that question.
Renshaw’s 190 Was an Exercise in Control, Patience and Responsibility
Renshaw scored his career-best 190 from 397 deliveries.
He occupied the crease for 468 minutes, striking 21 fours and one six.
The innings demanded a different approach from the explosive attacking style frequently associated with contemporary Australian batting.
Renshaw had to absorb pressure, protect partnerships and avoid leaving the lower order exposed.
He recognized that the match situation required time as well as runs.
The South African bowlers had already demonstrated that the surface could reward disciplined seam bowling.
Rather than attempt to counterattack immediately, Renshaw concentrated on keeping his wicket intact.
As the innings developed, he adjusted his approach to accommodate the batters joining him.
His patience gave Cummins, Lyon and Hazlewood opportunities to contribute.
It also forced South Africa to continue bowling long after they had expected the innings to end.
South Africa’s Biggest Mistake: Letting Australia Add 266 After 124/6
The decisive statistical finding is not simply Renshaw’s 190.
It is what happened after Australia lost their sixth wicket.
| Stage | Score | Partnership Runs |
|---|---|---|
| Sixth wicket falls | 124/6 | Starting position |
| Renshaw-Cummins, seventh wicket | 210/7 | 86 |
| Renshaw-Starc, eighth wicket | 230/8 | 20 |
| Renshaw-Lyon, ninth wicket | 364/9 | 134 |
| Renshaw-Hazlewood, tenth wicket | 390 all out | 26 |
| Runs after 124/6 | 266 | Four partnerships |
Australia’s last four partnerships added more than twice the score they had accumulated before the sixth wicket fell.
That was the moment South Africa lost their strongest opportunity to control the Test.
Cummins Provides the First Rescue
Pat Cummins joined Renshaw with Australia in serious trouble.
The captain contributed 43 from 98 deliveries.
Their 86-run seventh-wicket stand carried Australia to 210/7 and prevented South Africa from quickly exposing the final three batters.
By the close of the opening day, they had already added 63 unbeaten runs, leaving Australia at 187/6 when bad light stopped play.
That opening-day resistance was documented in TSE’s Day 1 report on Renshaw, Cummins and South Africa’s missed opportunity.
The partnership gave Australia something they desperately needed.
It allowed the visitors to return for the second day with an established batter and their captain still capable of extending the innings.
Nathan Lyon’s 134-Run Stand Becomes the Match’s Greatest Batting Surprise
When Lyon joined Renshaw, Australia were 230/8.
South Africa had another opportunity to end the innings before the visitors reached a commanding total.
Lyon refused to disappear.
He scored 27 from 92 deliveries, batting for 190 minutes.
Renshaw did most of the scoring, but Lyon’s ability to survive made their 134-run ninth-wicket partnership possible.
The pair carried Australia from 230/8 to 364/9.
It was the largest partnership of the innings.
That is an extraordinary outcome for a batting lineup that had lost six wickets for 124.
Lyon’s contribution also reveals why a lower-order innings should not be assessed purely by runs scored.
His 92 deliveries denied South Africa repeated opportunities to attack a new batter.
Renshaw could continue accumulating runs because someone remained capable of protecting the other end.
Australia eventually reached 390, with Renshaw the final wicket to fall.
From that position, the contest had changed.
South Africa’s Two-Spinner Selection Failed to Contain Renshaw
South Africa selected Keshav Maharaj and Simon Harmer together, anticipating that spin could become increasingly valuable as the Test progressed.
The decision was understandable before the match.
Conditions at Kingsmead can evolve, and a five-day Test requires bowling options beyond the opening spells of the fast bowlers.
But South Africa’s spinners struggled to turn their workload into wickets while Renshaw was building his innings.
In the first innings, Maharaj conceded 75 from 20 overs without taking a wicket.
Harmer returned 1/68 from 28.2 overs, dismissing Renshaw for 190.
The second innings was even more expensive.
| Bowler | First Innings | Second Innings | Match Figures |
|---|---|---|---|
| Keshav Maharaj | 0/75 | 2/56 | 2/131 |
| Simon Harmer | 1/68 | 1/121 | 2/189 |
| Combined | 1/143 | 3/177 | 4/320 |
Harmer conceded 121 from 25 overs during Australia’s second innings, while Maharaj conceded 56 from nine.
Their combined second-innings economy rate exceeded five runs per over.
That allowed Australia to accelerate rapidly toward their declaration.
Why the Spin Problem Affected South Africa’s Fast Bowlers
A spinner does not need to take wickets in every spell to provide value.
Controlling the scoring rate can allow fast bowlers to rest, preserve energy and return for attacking spells.
But if the spinners concede runs without creating regular wicket-taking pressure, the captain faces an uncomfortable choice.
He can continue using them and accept the scoring rate, or return to his fast bowlers more frequently.
In Durban, South Africa’s seamers had already worked hard during Australia’s long first innings.
The batting recovery stretched that workload further.
With Kagiso Rabada unavailable because of a hamstring problem, South Africa also lacked one of their most accomplished wicket-taking options.
Marco Jansen finished with three first-innings wickets, Wiaan Mulder took four and Anrich Nortje collected two on his Test return.
Those contributions were valuable.
But the bowlers could not prevent Australia from extending the innings once Renshaw established himself.
The hosts will have to revisit the balance of their attack before Gqeberha, especially if Rabada becomes available.
South Africa’s First Innings: Seven Useful Starts, No Half-Century
South Africa’s batting response contained another important reason for the eventual defeat.
The hosts were not destroyed by one catastrophic collapse.
Several batters established themselves and made useful contributions.
None reached 50.
David Bedingham top-scored with 49, while Aiden Markram made 37.
Tristan Stubbs added 32, Wiaan Mulder 30, Simon Harmer 35 and Keshav Maharaj 34.
Marco Jansen contributed an aggressive 26 from 20 balls.
Those innings helped South Africa reach 284.
But they did not provide the substantial individual score needed to match Renshaw’s contribution.
Australia’s Experienced Attack Shares the Wickets
Pat Cummins led the first-innings bowling figures with 3/54.
Mitchell Starc and Hazlewood took two wickets each, while Lyon also claimed two.
Beau Webster collected the final wicket.
The result was a coordinated bowling performance.
Australia repeatedly broke partnerships before South Africa could build an innings around one dominant batter.
That difference was central to the 106-run first-innings lead.
It also reinforced the concerns previously examined in TSE’s comprehensive preview of South Africa’s Test series against Australia.
The defending champions possess substantial talent, but their middle order must convert starts into long innings against an attack capable of maintaining pressure across successive spells.
Australia’s Second Innings: Renshaw Changes Gears as Cummins Finishes With Four Sixes
Australia began their second innings with a lead of 106.
They had already established an important advantage.
Instead of protecting it cautiously, they increased the scoring rate.
Nic Maddinson responded to his first-innings duck with 48 from 38 balls, striking six fours and two sixes.
Marnus Labuschagne and Steve Smith made 37 and 27 respectively.
Renshaw then produced another important innings, this time in a very different style.
Renshaw’s 82 From 99 Balls Shows His Adaptability
In the first innings, Renshaw spent 397 balls making 190.
In the second, he required only 99 deliveries for 82.
His strike rate climbed from 47.85 to 82.82.
He struck seven fours and two sixes, scoring more freely as Australia sought to build a declaration total quickly enough to leave sufficient time to dismiss South Africa.
The ability to change tempo was important.
A batter who can survive difficult conditions and then accelerate when the situation demands becomes especially valuable in the middle order.
Renshaw’s performances showed both qualities during the same match.
The contrast was already becoming clear by the end of Day 4, as explained in TSE’s detailed report on Renshaw’s 272 runs and Australia’s commanding position.
Cummins Turns the Final 12 Deliveries Into an Assault
Beau Webster provided an unbeaten 39 from 43 balls.
Cummins then produced a remarkable burst of lower-order hitting.
The Australian captain scored 32 not out from just 12 deliveries, striking four sixes at a strike rate of 266.66.
The late acceleration gave Australia 314/6 from 58 overs.
The innings progressed at 5.41 runs per over.
Cummins declared with Australia holding a lead of 420, setting South Africa 421 to win.
The declaration balanced two competing considerations.
Australia needed enough runs to make a South African victory highly unlikely.
They also needed sufficient time to take 10 wickets.
The 421-run target achieved the first objective.
By reducing South Africa to 102/4 before the close of Day 4, Australia made substantial progress toward the second.
Renshaw’s Two Wickets Were More Than a Statistical Bonus
Renshaw’s batting earned him the Player of the Match award.
His part-time off-spin added another dimension.
He removed South Africa captain Bavuma for one during the fourth innings, claiming his maiden Test wicket.
Bavuma had faced 18 deliveries when Maddinson completed the catch.
The wicket moved South Africa to 82/3 and removed one of the players most capable of batting through an extended period.
Renshaw returned on the final day to dismiss Kyle Verreynne for one.
He finished with 2/30 from 13 overs, including two maidens.
That performance made his match statistics particularly impressive.
He had contributed 272 runs with the bat, then taken two wickets while Australia attempted to secure victory.
The value of those wickets lies in their timing.
Bavuma’s dismissal damaged South Africa’s attempt to establish a defensive partnership on Day 4.
Verreynne’s wicket broke the middle order shortly after Hazlewood removed Mulder on Day 5.
Both dismissals reduced the burden on Australia’s established attack.
Nathan Lyon’s Wicketless 20 Overs Were a Quiet Match-Winning Contribution
Hazlewood’s six wickets and Renshaw’s extraordinary batting figures will dominate the memories of this Test.
Lyon’s contribution deserves equal attention from a tactical perspective.
The off-spinner finished South Africa’s second innings without a wicket.
He bowled 20 overs, conceded only 32 runs and delivered five maidens.
His economy rate was 1.60.
How Lyon Created Pressure Without Taking a Wicket
Australia did not require every bowler to attack recklessly for wickets.
They needed to prevent South Africa from scoring freely while maintaining enough pressure for mistakes to emerge.
Lyon’s accuracy helped achieve that objective.
His overspin and bounce challenged batters while his disciplined line limited easy scoring opportunities.
That allowed Cummins to rotate the fast bowlers without giving South Africa a comfortable scoring option at the other end.
When pressure is maintained across both ends, a batter cannot simply wait for one bowler to finish and then release the pressure against his replacement.
That was part of Australia’s advantage.
Lyon supplied control while Hazlewood, Cummins and Starc pursued wickets.
The value of an experienced Test bowler therefore extends beyond the number appearing in the wickets column.
It includes the ability to control an innings across prolonged periods.
That principle is central to TSE’s examination of whether modern fast bowlers are losing the traditional skills of Test cricket, which explores workload, rhythm and the importance of constructing dismissals through sustained pressure.
Why Lyon’s Batting Also Mattered
Lyon contributed in both halves of the contest.
His 27 from 92 balls helped Renshaw add 134 for the ninth wicket in Australia’s first innings.
Then his economical bowling ensured South Africa could not comfortably reduce Australia’s control during the fourth innings.
He also completed the catch that ended Nortje’s innings and gave Hazlewood his sixth wicket.
Those contributions are easily lost when attention focuses only on Renshaw’s 272 runs and Hazlewood’s career-best haul.
Yet they were important parts of the same victory.
What Cummins and Bavuma Said After the Durban Test
Pat Cummins Praises Renshaw’s Rescue and Hazlewood’s Versatility
Australia captain Pat Cummins identified Renshaw’s first-innings performance as the foundation of the victory.
He was pleased that his side managed to seize the lead after recovering from the early collapse and then protect that advantage throughout the remaining innings.
Cummins also praised Australia’s established bowling attack.
He described Hazlewood as a bowler whose reputation for consistency can obscure his broader skills.
Hazlewood can generate reverse swing, adjust his pace and operate effectively across different conditions.
For a captain, that versatility is especially valuable during a five-day Test.
Cummins also expressed satisfaction with his own bowling after a period of limited Test appearances.
He felt capable of extending his spells when required and welcomed the confidence gained from winning the opening match away from home.
His assessment reflected the value of both the result and the way Australia achieved it.
The visitors had suffered an early batting failure, recovered through the lower order, established a lead and maintained pressure until the final wicket fell.
Temba Bavuma Admits South Africa Failed to Finish Strong Positions
South Africa captain Bavuma acknowledged that his side had been outplayed for substantial periods of the Test.
He was particularly disappointed that the hosts allowed Australia to recover after reducing them to 124/6.
The Proteas had created an opportunity to dismiss the visitors cheaply but failed to convert it.
Bavuma also identified the batting lineup’s inability to produce a substantial first-innings score as a major problem.
Several South African batters made starts, but none converted them into a half-century.
Renshaw, by contrast, made 190.
Bavuma believed South Africa needed to learn from Australia’s proactive bowling approach and improve their ability to capitalize when opponents were under pressure.
The defeat was particularly significant because it was his first as South Africa’s Test captain.
That record had survived previous challenges, including South Africa’s triumph over Australia in the 2025 World Test Championship Final.
Durban brought it to an end.
Matt Renshaw Reflects on His New Middle-Order Responsibility
Renshaw admitted that the match had been physically demanding after a long period without playing a full five-day Test.
His first objective had been to remain at the crease as long as possible on the opening day.
He wanted to build partnerships with the lower order and face enough deliveries to transform Australia’s position.
Renshaw also explained that South Africa’s field placements made it difficult to rotate the strike through twos, requiring him to take selected boundary-scoring opportunities.
He welcomed the chance to contribute at No. 5, a role different from the opening position associated with much of his earlier Test career.
The innings provided a strong case for keeping him in the middle order.
However, Australia’s broader selection situation remains flexible, and his long-term batting position has not been definitively settled.
How the Durban Test Unfolded Across Five Days
| Day | Position at Stumps | Decisive Development |
|---|---|---|
| Day 1, October 9 | Australia 187/6 | South Africa reduce Australia to 124/6 before Renshaw and Cummins begin recovery |
| Day 2, October 10 | Australia 390; South Africa 27/1 | Renshaw scores 190 and shares 134 with Lyon for the ninth wicket |
| Day 3, October 11 | South Africa 284; Australia 33/0 | Australia establish a 106-run first-innings lead |
| Day 4, October 12 | Australia 314/6d; South Africa 102/4 | Renshaw scores 82 and takes his first Test wicket as Australia set 421 |
| Day 5, October 13 | South Africa 206 all out | Hazlewood claims 6/49 to seal a 214-run victory |
The match was affected by poor light during the first three days, but Australia eventually created sufficient time to take all 20 South African wickets.
The shortened early sessions also made Renshaw’s first-innings endurance more significant.
He occupied the crease long enough to transform Australia’s position despite interruptions and South Africa’s strong opening spells.
What the Result Means for the World Test Championship
Australia entered the Durban Test as one of the leading contenders for the 2025-27 ICC World Test Championship Final.
South Africa arrived as defending champions after defeating Australia in the 2025 final.
The visitors’ victory therefore has consequences beyond the bilateral series.
Australia earned 12 World Test Championship points from the win.
South Africa received none.
Following the result, Australia’s points percentage rose to approximately 81.82, strengthening their position at the top of the standings.
South Africa fell to approximately 60.00 percent and dropped to third behind New Zealand, according to updated post-match standings reporting.
These figures reflect the reported points position following the match and remain subject to any later over-rate deductions.
Why One Defeat Matters So Much in the WTC
The World Test Championship ranks teams by points percentage rather than total wins alone.
That system accounts for differences in the number of Tests countries play during the cycle.
A victory is worth 12 points, a draw four and a tie six, with points deductions possible for slow over rates.
As a result, a defeat can have a substantial impact on a team’s percentage, particularly when it has played relatively few matches.
Australia’s victory keeps the visitors in a strong position to challenge for a place in the 2027 final.
South Africa remain in contention, but their route has become more demanding.
The hosts now face the possibility of falling 2-0 behind if they lose in Gqeberha.
That would also hand Australia the three-match series with one Test remaining.
Gqeberha Is Now a Test of South Africa’s Selection and Response
The second Test begins on October 18 at St George’s Park in Gqeberha.
The venue will present different conditions, but South Africa’s problems cannot be reduced to the playing surface.
The batting lineup must produce longer individual innings.
The bowlers must find a way to dismiss Australia’s lower order without allowing another major recovery.
And the balance of the side may require reconsideration.
Will Kagiso Rabada Return for the Second Test?
Rabada missed the opening match while recovering from a hamstring injury.
His possible return would strengthen South Africa’s pace options, especially after the disappointing results from their two-spinner combination.
However, his selection depends on medical clearance, fitness and the team’s final assessment before Gqeberha.
No confirmed return should be assumed before the squad and team announcements.
Continue the Cricket Story
 CricketSouth Africa vs Australia Test Series Preview: Eight Years After Sandpapergate, the WTC Champions Await Australia’s Return
 CricketHave Cricketers Become Too Friendly On and Off the Field?
 CricketAfghanistan Keep Bangladesh at Bay as Qais Salvages a Historic Draw in the One-Off Test in Abu Dhabi
Nortje’s performance in Durban also deserves consideration.
He claimed two wickets in Australia’s first innings and two more in the second, showing that his pace remains a useful option after an extended absence from Test cricket.
South Africa must decide how best to combine that pace with Jansen, Mulder and potentially Rabada.
Could Renshaw Stay at No. 5?
Australia face an interesting selection question of their own.
Renshaw has made an overwhelming case for retaining a place in the XI.
But whether he continues at No. 5 may depend on the availability of other batters.
Cameron Green and Josh Inglis have been managing injuries, while Maddinson’s return has created further competition for batting positions.
Australia may choose continuity after such a convincing victory.
They could also reconsider the order if returning players require accommodation.
Renshaw’s performance gives the selectors flexibility, although it also makes any decision to move him from the successful middle-order role more difficult to justify.
Australia vs South Africa 2026: Remaining Test Series Schedule
| Match | Dates | Venue | Series Situation |
|---|---|---|---|
| Second Test | October 18-22, 2026 | St George’s Park, Gqeberha | South Africa seek to level the series |
| Third Test | October 27-31, 2026 | Newlands, Cape Town | Series finale |
The dates and venues are confirmed in Cricket Australia’s official 2026 South Africa tour guide.
The schedule also reinforces the workload challenge facing Australia’s experienced attack.
Hazlewood, Starc, Cummins and Lyon must prepare for another Test beginning only five days after the Durban finish.
That issue has been prominent during a demanding Australian international calendar.
For broader context, TSE’s analysis of 19 consecutive scheduled days of Test cricket in August examined the growing physical and logistical demands imposed by overlapping international schedules.
Australia possess the experience to manage those demands, but player availability and recovery will remain important as the series progresses.
The Sports Encounter’s Tactical Verdict: Why Australia Won and South Africa Lost
The result was built through several connected decisions and performances.
| Decisive Factor | Evidence | Match Consequence |
|---|---|---|
| Renshaw’s first-innings rescue | 190 after Australia fell to 124/6 | Converted a vulnerable total into 390 |
| Lower-order resistance | 266 runs added after the sixth wicket | Denied South Africa the chance to secure a first-innings advantage |
| Australia’s faster second innings | 314/6 declared at 5.41 runs per over | Set an imposing 421 target with time remaining |
| Partnership bowling | Lyon’s 20 overs for 32 in the fourth innings | Restricted scoring and helped preserve pressure |
| Hazlewood’s finishing spell | Career-best 6/49 | Ended South Africa’s resistance and secured victory |
Australia’s Most Important Strength Was Their Ability to Recover
The visitors did not play flawless cricket.
Their top order collapsed early.
South Africa’s seamers created difficult batting conditions, and Australia’s selection questions remained visible.
Yet the team found solutions.
Renshaw and Cummins prevented the first innings from collapsing.
Lyon’s lower-order resistance turned recovery into control.
The bowling attack then converted that advantage into a 106-run lead.
Renshaw’s faster second innings and Cummins’ late assault created a demanding target.
Hazlewood finished the contest.
The progression shows why successful Test teams need more than an excellent starting XI on paper.
They need players who can solve problems when the original plan fails.
South Africa’s Most Important Weakness Was Their Failure to Convert Starts
The hosts created several opportunities.
They had Australia 124/6.
They had multiple batters get established during the first innings.
They briefly resisted through Markram and Mulder on the final day.
But none of those opportunities became a decisive advantage.
Renshaw converted a difficult start into 190.
South Africa’s best first-innings score was 49.
That comparison is one of the clearest explanations for the defeat.
It also mirrors a problem Australia experienced during their series against Bangladesh earlier in the year.
In Darwin, Australia failed to build substantial partnerships and suffered a historic defeat. TSE’s analysis of Bangladesh’s victory in Darwin explored how disciplined bowling and batting resilience exposed Australia’s weaknesses.
The visitors responded in Mackay, with Mitchell Starc taking 10 wickets as Australia won by an innings.
That turnaround was examined in our report on Australia’s recovery against Bangladesh.
Durban provides another example of how quickly Test fortunes can change when an established team responds effectively to adversity.
South Africa vs Australia First Test 2026: Frequently Asked Questions
Who won the first Test between South Africa and Australia in Durban?
Australia won by 214 runs at Kingsmead on October 13, 2026, taking a 1-0 lead in the three-match series.
Who was Player of the Match?
Matt Renshaw received the award after scoring 190 and 82 and taking two wickets for 30 runs.
How many runs did Matt Renshaw score in the match?
Renshaw scored 272 runs across two innings, including a career-best 190 from 397 balls and 82 from 99 balls.
What were Josh Hazlewood’s bowling figures?
Hazlewood took a career-best 6/49 in South Africa’s second innings. He also took 2/54 in the first innings, finishing with eight wickets in the match.
What was South Africa’s fourth-innings target?
South Africa were set 421 to win after Australia declared their second innings at 314/6.
Who scored the most runs for South Africa?
Aiden Markram top-scored with 75 from 237 deliveries in the second innings. David Bedingham’s 49 was South Africa’s highest score in the first innings.
What was Nathan Lyon’s contribution?
Lyon scored 27 during a 134-run ninth-wicket partnership with Renshaw, took two wickets in South Africa’s first innings and conceded only 32 runs from 20 wicketless overs in the fourth innings.
Why was Kagiso Rabada absent?
Rabada missed the opening Test while recovering from a hamstring injury. His availability for Gqeberha depends on fitness and selection assessments.
Was this Temba Bavuma’s first Test defeat as South Africa captain?
Yes. Australia’s 214-run victory ended Bavuma’s unbeaten record as South Africa’s Test captain.
When is the second Test between South Africa and Australia?
The second Test begins on October 18, 2026, at St George’s Park in Gqeberha. The third Test is scheduled for October 27-31 at Newlands in Cape Town.
Complete South Africa vs Australia First Test Scorecard
The following scorecards contain all four innings, including individual batting performances, bowling figures and extras. Cricket overs use six-ball notation, so 86.5 means 86 overs and five legal deliveries.
Australia First Innings: 390 All Out in 137.2 Overs
| Batter | Dismissal | Runs | Balls | 4s | 6s |
|---|---|---|---|---|---|
| Nic Maddinson | b Jansen | 0 | 33 | 0 | 0 |
| Travis Head | c Verreynne b Mulder | 9 | 19 | 2 | 0 |
| Marnus Labuschagne | lbw b Mulder | 37 | 58 | 6 | 0 |
| Steven Smith | c Mulder b Jansen | 25 | 53 | 0 | 2 |
| Matt Renshaw | c Markram b Harmer | 190 | 397 | 21 | 1 |
| Alex Carey (wk) | c Markram b Nortje | 14 | 44 | 1 | 0 |
| Beau Webster | c Verreynne b Nortje | 4 | 2 | 1 | 0 |
| Pat Cummins (c) | c Markram b Mulder | 43 | 98 | 6 | 0 |
| Mitchell Starc | b Mulder | 6 | 25 | 1 | 0 |
| Nathan Lyon | lbw b Jansen | 27 | 92 | 5 | 0 |
| Josh Hazlewood | Not out | 5 | 11 | 1 | 0 |
| Extras | 20 lb, 8 nb, 2 w | 30 | |||
| Total | All out | 390 | 137.2 overs | ||
Fall of wickets: 17/1, 24/2, 84/3, 84/4, 120/5, 124/6, 210/7, 230/8, 364/9, 390 all out.
| Bowler | Overs | Maidens | Runs | Wickets |
|---|---|---|---|---|
| Marco Jansen | 31 | 9 | 68 | 3 |
| Wiaan Mulder | 27 | 6 | 68 | 4 |
| Anrich Nortje | 28 | 5 | 88 | 2 |
| Keshav Maharaj | 20 | 0 | 75 | 0 |
| Simon Harmer | 28.2 | 1 | 68 | 1 |
| Aiden Markram | 3 | 0 | 3 | 0 |
South Africa First Innings: 284 All Out in 78 Overs
| Batter | Dismissal | Runs | Balls | 4s | 6s |
|---|---|---|---|---|---|
| Aiden Markram | c Renshaw b Starc | 37 | 67 | 7 | 0 |
| Ryan Rickelton | c Webster b Hazlewood | 0 | 3 | 0 | 0 |
| David Bedingham | c Smith b Cummins | 49 | 73 | 9 | 0 |
| Temba Bavuma (c) | c Smith b Lyon | 3 | 27 | 0 | 0 |
| Tristan Stubbs | c Hazlewood b Cummins | 32 | 66 | 3 | 0 |
| Wiaan Mulder | c substitute b Cummins | 30 | 50 | 3 | 1 |
| Kyle Verreynne (wk) | c Smith b Lyon | 13 | 20 | 2 | 0 |
| Marco Jansen | c Head b Hazlewood | 26 | 20 | 6 | 0 |
| Simon Harmer | Not out | 35 | 75 | 4 | 1 |
| Keshav Maharaj | c Cummins b Starc | 34 | 44 | 2 | 1 |
| Anrich Nortje | c Smith b Webster | 16 | 26 | 3 | 0 |
| Extras | 6 lb, 3 nb | 9 | |||
| Total | All out | 284 | 78 overs | ||
Fall of wickets: 0/1, 84/2, 93/3, 99/4, 155/5, 162/6, 197/7, 197/8, 249/9, 284 all out.
| Bowler | Overs | Maidens | Runs | Wickets |
|---|---|---|---|---|
| Mitchell Starc | 17 | 2 | 63 | 2 |
| Josh Hazlewood | 16 | 2 | 54 | 2 |
| Pat Cummins | 15 | 2 | 54 | 3 |
| Nathan Lyon | 22 | 3 | 58 | 2 |
| Travis Head | 3 | 0 | 20 | 0 |
| Beau Webster | 3 | 0 | 23 | 1 |
| Marnus Labuschagne | 2 | 0 | 6 | 0 |
Australia Second Innings: 314/6 Declared in 58 Overs
| Batter | Dismissal | Runs | Balls | 4s | 6s |
|---|---|---|---|---|---|
| Nic Maddinson | b Nortje | 48 | 38 | 6 | 2 |
| Travis Head | c Bavuma b Jansen | 11 | 18 | 2 | 0 |
| Marnus Labuschagne | c Bavuma b Maharaj | 37 | 58 | 4 | 0 |
| Steven Smith | c Jansen b Harmer | 27 | 41 | 3 | 1 |
| Matt Renshaw | c and b Maharaj | 82 | 99 | 7 | 2 |
| Alex Carey (wk) | b Nortje | 24 | 39 | 3 | 0 |
| Beau Webster | Not out | 39 | 43 | 5 | 0 |
| Pat Cummins (c) | Not out | 32 | 12 | 0 | 4 |
| Extras | 4 b, 8 lb, 2 w | 14 | |||
| Total | 6 wickets declared | 314 | 58 overs | ||
Did not bat: Mitchell Starc, Nathan Lyon, Josh Hazlewood.
Fall of wickets: 43/1, 72/2, 125/3, 157/4, 205/5, 270/6.
| Bowler | Overs | Maidens | Runs | Wickets |
|---|---|---|---|---|
| Marco Jansen | 8 | 0 | 45 | 1 |
| Wiaan Mulder | 4 | 0 | 24 | 0 |
| Simon Harmer | 25 | 1 | 121 | 1 |
| Anrich Nortje | 12 | 1 | 56 | 2 |
| Keshav Maharaj | 9 | 0 | 56 | 2 |
South Africa Second Innings: 206 All Out in 86.5 Overs
| Batter | Dismissal | Runs | Balls | 4s | 6s |
|---|---|---|---|---|---|
| Ryan Rickelton | c Carey b Hazlewood | 2 | 12 | 0 | 0 |
| Aiden Markram | c Carey b Starc | 75 | 237 | 10 | 0 |
| David Bedingham | lbw b Hazlewood | 46 | 68 | 8 | 0 |
| Temba Bavuma (c) | c Maddinson b Renshaw | 1 | 18 | 0 | 0 |
| Tristan Stubbs | c Carey b Cummins | 1 | 12 | 0 | 0 |
| Wiaan Mulder | c Carey b Hazlewood | 29 | 110 | 3 | 0 |
| Kyle Verreynne (wk) | c Smith b Renshaw | 1 | 3 | 0 | 0 |
| Marco Jansen | b Hazlewood | 35 | 54 | 6 | 1 |
| Simon Harmer | c Carey b Hazlewood | 0 | 3 | 0 | 0 |
| Keshav Maharaj | Not out | 1 | 3 | 0 | 0 |
| Anrich Nortje | c Lyon b Hazlewood | 4 | 4 | 1 | 0 |
| Extras | 6 lb, 3 nb, 2 w | 11 | |||
| Total | All out | 206 | 86.5 overs | ||
Fall of wickets: 7/1, 73/2, 82/3, 86/4, 155/5, 156/6, 201/7, 201/8, 201/9, 206 all out.
| Bowler | Overs | Maidens | Runs | Wickets |
|---|---|---|---|---|
| Mitchell Starc | 16 | 5 | 33 | 1 |
| Josh Hazlewood | 16.5 | 4 | 49 | 6 |
| Pat Cummins | 14 | 5 | 34 | 1 |
| Nathan Lyon | 20 | 5 | 32 | 0 |
| Matt Renshaw | 13 | 2 | 30 | 2 |
| Beau Webster | 3 | 2 | 4 | 0 |
| Nic Maddinson | 4 | 1 | 18 | 0 |
The Sports Encounter Verdict: Renshaw Saved the Test, Hazlewood Finished the Argument
Australia’s victory in Durban will be remembered for Hazlewood’s six wickets and Renshaw’s 272 runs.
Those numbers deserve attention.
But the deeper story is how Australia responded after South Africa appeared to have taken control.
At 124/6, the visitors faced the possibility of another serious batting failure.
Renshaw did not allow that situation to define the innings.
Cummins helped him rebuild.
Lyon stayed long enough to create the highest partnership of the innings.
The last four wickets added 266.
South Africa never fully recovered from that reversal.
Their batters made starts without producing an innings comparable to Renshaw’s 190.
Then Australia’s second innings accelerated quickly enough to create a target of 421 while leaving time to take the remaining wickets.
Renshaw added two dismissals.
Lyon maintained control.
Starc removed Markram after a long struggle.
Hazlewood completed the collapse.
The result gives Australia a valuable series lead and strengthens their position in the World Test Championship.
South Africa face a more difficult challenge than simply winning the next Test.
They must identify why their strongest early opportunity disappeared and why their batters repeatedly failed to convert promising starts into substantial scores.
The Proteas have recovered from losing series openers before, including during the difficult 2018 contest against Australia.
But Gqeberha will require a significantly better performance.
For Australia, Renshaw’s emergence is particularly encouraging.
A team with an aging batting and bowling core has found a player capable of surviving a crisis, accelerating when necessary and even taking useful wickets.
The selection questions have not disappeared.
They have become more interesting because of his success.
South Africa won the opening afternoon.
Renshaw won the battle to save Australia’s innings.
Hazlewood ensured Australia won the Test.
For more Test match reports, World Test Championship analysis and coverage of the South Africa-Australia series, visit The Sports Encounter’s cricket section.
Source note: Match results, innings figures and final-day developments have been cross-checked against official ICC coverage and the completed scorecard. Captain and Player of the Match comments are based on the post-match presentation. The tactical interpretations are The Sports Encounter’s editorial analysis.