


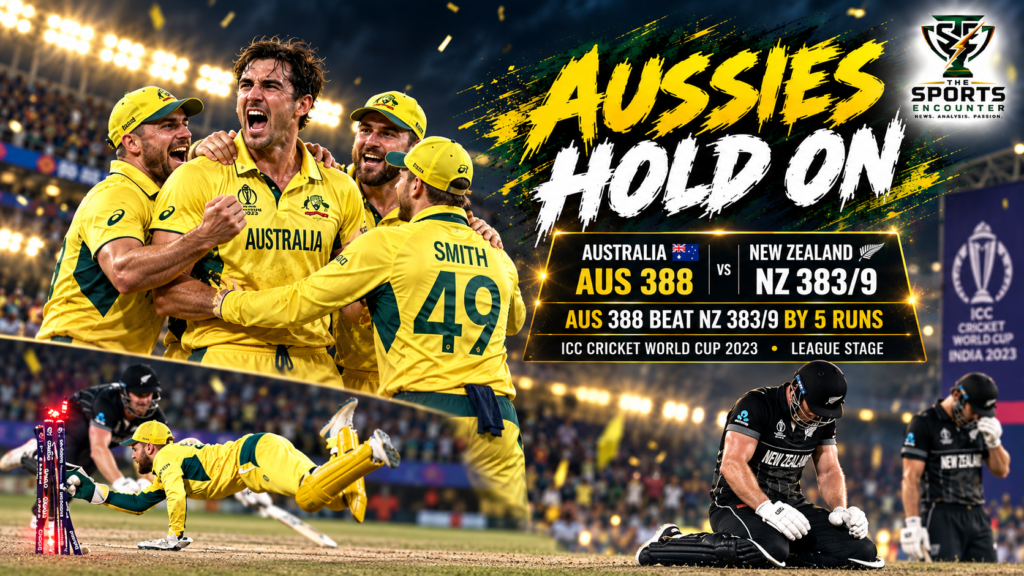
DHARAMSALA, India, October 28, 2023: Australia had scored 388.
New Zealand still needed 96 runs from 58 balls when Rachin Ravindra fell.
That should have settled it.
It did not.
Jimmy Neesham attacked the target.
Trent Boult hit a six.
Mitchell Starc lost five wides down the leg side in the final over.
Australia were forced to keep an extra fielder inside the circle because of a slow over rate.
New Zealand needed seven from two balls.
Then Marnus Labuschagne collected Neesham’s miscued full toss and fired the ball back toward the striker’s end.
Neesham dived.
Too late.
Run out for 58.
New Zealand still needed six from the final delivery.
Lockie Ferguson could not find the boundary.
Australia had survived.
Australia 388. New Zealand 383/9. Five runs.
That is why this match is No. 41 in A Celebration of 5000 ODIs.
The raw numbers are extraordinary enough.
Seven hundred and seventy-one runs.
Two centuries.
Thirty-nine sixes and fours combined? No. Far more. The afternoon became an uninterrupted argument between batting aggression and increasingly desperate bowling.
But the reason this match belongs in the series goes deeper than the scoring rate.
Australia repeatedly built positions that looked decisive.
New Zealand repeatedly refused to accept them.
Head and Warner put on 175.
Phillips dragged Australia back.
Australia still reached 388.
Ravindra made 116.
Australia removed him.
Neesham took over.
The result remained alive until the last ball.
That is exactly the kind of ODI the format was built to produce.
TL;DR
- New Zealand won the toss and chose to field.
- Australia made 388 all out in 49.2 overs.
- Travis Head scored 109 from 67 balls.
- David Warner made 81 from 65.
- Head and Warner added 175 for the first wicket.
- Head reached his century from only 59 balls.
- Glenn Phillips took 3/37 from 10 overs.
- Trent Boult also took 3/77.
- Glenn Maxwell made 41 from 24.
- Josh Inglis scored 38 from 28.
- Pat Cummins smashed 37 from 14.
- New Zealand replied with 383/9.
- Rachin Ravindra scored 116 from 89 balls.
- Daryl Mitchell made 54 from 51.
- Jimmy Neesham scored 58 from 39.
- Adam Zampa took 3/74.
- Josh Hazlewood and Pat Cummins took two wickets each.
- New Zealand needed 19 from the final over.
- Starc conceded five wides in that over.
- Neesham was run out from the penultimate ball.
- New Zealand needed six from the final delivery.
- Ferguson failed to score.
- Australia won by five runs.
- Travis Head was named Player of the Match.
- Australia recorded a fourth consecutive World Cup victory.
- New Zealand suffered a second straight defeat but remained third in the standings after the match.
Australia vs New Zealand 2023 World Cup: Match at a Glance
| Detail | Information |
|---|---|
| Competition | ICC Men’s Cricket World Cup 2023 |
| Match | 27th Match |
| Date | October 28, 2023 |
| Venue | Himachal Pradesh Cricket Association Stadium, Dharamsala |
| Toss | New Zealand won and fielded |
| Australia | 388 all out in 49.2 overs |
| New Zealand | 383/9 in 50 overs |
| Result | Australia won by five runs |
| Player of the Match | Travis Head |
| Australia top scorer | Travis Head, 109 |
| New Zealand top scorer | Rachin Ravindra, 116 |
| Best New Zealand bowling | Glenn Phillips, 3/37 |
| Best Australia bowling | Adam Zampa, 3/74 |
| Highest partnership | Head and Warner, 175 |
| Final-over equation | New Zealand needed 19 |
| Penultimate-ball turning point | Neesham run out for 58 |
| Total match aggregate | 771 runs |
| Tournament consequence | Australia strengthened semifinal position |
Why Match 41 Belongs in A Celebration of 5000 ODIs
The main A Celebration of 5000 ODIs series selected this game for one simple statistical reason.
Australia scored 388.
New Zealand replied with 383.
After 771 runs, only five separated them.
That number alone makes the match remarkable.
But great ODIs are rarely remembered only because of aggregate runs.
This one had several different games inside it.
Australia’s opening assault suggested 400-plus.
Phillips’ spell suggested New Zealand had recovered.
Cummins’ 14-ball 37 pushed Australia back toward 390.
Hazlewood removed both New Zealand openers.
Ravindra rebuilt.
Zampa broke the middle order.
Neesham then transformed a likely defeat into a final-over chase.
Even the fielding regulations became part of the finish when Australia’s slow over rate left them with only four boundary riders for the last over.
This was not merely a run fest.
It was a match in which every phase created a new problem for the side that appeared ahead.
Player of the Match Travis Head Returns as if He Never Left
Head had missed Australia’s opening five World Cup matches because of a broken hand.
His first appearance came here.
He opened the batting.
And he immediately played one of the most explosive innings of the tournament.
109 runs
67 balls
10 fours
7 sixes
Strike rate: 162.68
Head reached fifty in 28 balls.
He reached his century in 59.
There was no cautious return.
No easing back into international cricket.
New Zealand’s fast bowlers repeatedly missed their lengths, and Head punished them square and straight.
The innings did more than give Australia runs.
It restored a player who would become central to the remainder of their World Cup campaign.
His importance to Australia’s ODI batting would continue long after 2023, something TSE has revisited in Travis Head’s later 112-run ODI against Zimbabwe.
David Warner Turns the Powerplay Into an Assault
Head was not attacking alone.
Warner made 81 from 65 balls.
Five fours.
Six sixes.
Strike rate: 124.61.
The opening partnership reached 175 from 19 overs.
That stand established the entire shape of Australia’s innings.
New Zealand had won the toss expecting to use the morning conditions.
Instead, their bowlers spent almost 20 overs searching for a breakthrough.
Warner finally chipped Phillips back to the bowler.
By then, Australia already had a total many teams would consider competitive.
They still had more than 30 overs remaining.
Glenn Phillips Prevents Australia From Reaching Something Even Bigger
At 175/0, New Zealand were in serious trouble.
Phillips changed the innings.
He removed Warner.
Then Head.
Then Steve Smith.
His final figures were exceptional given the conditions:
10 overs
37 runs
3 wickets
Economy: 3.70
Every other New Zealand bowler struggled badly at some stage.
Phillips did not.
He slowed the scoring rate.
He forced Australia’s middle order to rebuild.
And he helped transform a projected 430-plus total into something closer to 380.
That may sound like a small victory when Australia still made 388.
In context, it almost saved the match.
Travis Head’s Wicket at 200/2 Gives New Zealand a Way Back
Head was bowled by Phillips for 109.
Australia were 200/2 after 23.2 overs.
Still dominant.
But no longer accelerating uncontrollably.
Mitchell Marsh made 36 from 51.
Smith made 18.
Marnus Labuschagne made 18.
Australia’s scoring rate slowed dramatically through the middle phase.
New Zealand had survived the opening storm.
The match could still have moved toward 340 or 350.
Then Australia’s lower order attacked.
Glenn Maxwell Restores Australia’s Momentum
Maxwell scored:
41 from 24 balls
Five fours.
Two sixes.
Strike rate: 170.83
His role was brief and decisive.
Australia had lost some rhythm after Head departed.
Maxwell immediately changed that.
He attacked pace.
He attacked spin.
He forced New Zealand back into defensive fields.
By the time Neesham removed him at 325/6, the innings had rediscovered the aggression that defined the first 20 overs.
Josh Inglis Keeps Australia Moving
Inglis added 38 from 28 balls.
Four fours.
One six.
The innings provided continuity between Maxwell and Cummins.
Australia needed that because wickets were beginning to fall more regularly.
Inglis kept finding boundaries without requiring a long settling period.
He eventually fell to Boult at 387/7.
By then, the total was already enormous.
Pat Cummins Turns 14 Balls Into 37 Runs
Cummins produced one of the most damaging late cameos of the World Cup.
37 from 14 balls
Two fours.
Four sixes.
Strike rate: 264.29
Australia’s captain did not simply add useful runs.
He changed the target.
New Zealand had managed to slow the middle overs.
Cummins erased much of that recovery in minutes.
His hitting helped push Australia from a large total toward one that required the highest successful chase in World Cup history.
New Zealand Still Take Five Wickets for One Run
The end of Australia’s innings contained another twist.
Australia were 387/6.
Then Inglis fell.
Cummins fell.
Zampa fell.
Starc fell.
Australia were all out for 388.
The final four wickets added only one run.
Boult took three wickets overall.
Matt Henry removed Starc.
That late burst mattered because Australia lost eight deliveries they could have used.
Even after 388, there was a sense that the innings might have been larger.
That feeling would become uncomfortable five hours later.
Complete Match Scorecard
Australia Batting: 388 All Out in 49.2 Overs
| Batter | Dismissal | R | B | 4s | 6s | SR |
|---|---|---|---|---|---|---|
| David Warner | c & b Glenn Phillips | 81 | 65 | 5 | 6 | 124.62 |
| Travis Head | b Glenn Phillips | 109 | 67 | 10 | 7 | 162.69 |
| Mitchell Marsh | b Mitchell Santner | 36 | 51 | 2 | 0 | 70.59 |
| Steve Smith | c Trent Boult b Glenn Phillips | 18 | 17 | 2 | 0 | 105.88 |
| Marnus Labuschagne | c Rachin Ravindra b Mitchell Santner | 18 | 26 | 2 | 0 | 69.23 |
| Glenn Maxwell | c Trent Boult b Jimmy Neesham | 41 | 24 | 5 | 2 | 170.83 |
| Josh Inglis (wk) | c Glenn Phillips b Trent Boult | 38 | 28 | 4 | 1 | 135.71 |
| Pat Cummins (c) | lbw b Trent Boult | 37 | 14 | 2 | 4 | 264.29 |
| Mitchell Starc | c Jimmy Neesham b Matt Henry | 1 | 3 | 0 | 0 | 33.33 |
| Adam Zampa | b Trent Boult | 0 | 3 | 0 | 0 | 0.00 |
| Josh Hazlewood | not out | 0 | 0 | 0 | 0 | 0.00 |
Extras: 9
Total: 388 all out in 49.2 overs
Run rate: 7.86
Fall of wickets: 175/1 Warner (19.1), 200/2 Head (23.2), 228/3 Smith (29.4), 264/4 Marsh (36.3), 274/5 Labuschagne (38.1), 325/6 Maxwell (44.3), 387/7 Inglis (48.1), 388/8 Cummins (48.3), 388/9 Zampa (48.6), 388/10 Starc (49.2).
New Zealand Bowling
| Bowler | O | M | R | W | Econ |
|---|---|---|---|---|---|
| Matt Henry | 6.2 | 0 | 67 | 1 | 10.58 |
| Trent Boult | 10 | 0 | 77 | 3 | 7.70 |
| Lockie Ferguson | 3 | 0 | 38 | 0 | 12.67 |
| Mitchell Santner | 10 | 0 | 80 | 2 | 8.00 |
| Glenn Phillips | 10 | 0 | 37 | 3 | 3.70 |
| Rachin Ravindra | 8 | 0 | 56 | 0 | 7.00 |
| Jimmy Neesham | 2 | 0 | 32 | 1 | 16.00 |
New Zealand Refuse to Treat 389 as Impossible
Chasing 389 in a World Cup should create pressure from the first over.
New Zealand played as though the target was difficult rather than absurd.
Devon Conway attacked immediately.
He made 28 from 17 balls.
Will Young contributed 32 from 37.
Hazlewood removed both.
New Zealand were 72/2.
Australia finally appeared to have control.
Then Ravindra arrived.
Rachin Ravindra Turns 72/2 Into a Real Chase
Ravindra produced one of the best innings of the 2023 World Cup.
116 runs
89 balls
9 fours
5 sixes
Strike rate: 130.34
The innings was remarkable because he never allowed the required rate to become psychologically overwhelming.
He attacked when Australia missed.
He rotated when the boundary was unavailable.
He allowed Daryl Mitchell to play naturally beside him.
New Zealand moved from 72/2 to 168/3.
Then from 168 to 222.
The chase remained alive.
Ravindra had already established himself as one of the tournament’s breakout players, a campaign that later helped earn him recognition in TSE’s review of the 2023 ICC award winners.
Daryl Mitchell Gives Ravindra the Partnership He Needs
Mitchell made 54 from 51 balls.
Six fours.
One six.
He and Ravindra added 96 runs for the third wicket.
The partnership transformed the chase.
At 72/2, Australia could attack.
At 168/2, they were defending 221 runs with more than half the innings gone but two set batters in control.
Mitchell eventually attacked Zampa and was caught by Starc.
That wicket mattered because Australia had finally separated New Zealand’s strongest partnership.
Ravindra remained.
Adam Zampa Keeps Taking the Wickets Australia Need
Zampa’s final figures were expensive by conventional standards:
10 overs
74 runs
3 wickets
But this was not a conventional match.
His wickets were Daryl Mitchell, Tom Latham and Mitchell Santner.
Three batters capable of sustaining the chase.
Zampa repeatedly broke partnerships before New Zealand could establish complete control.
That is why his spell mattered more than the economy rate suggests.
TSE has since revisited Zampa’s ODI importance in its coverage of his 200-wicket milestone against Zimbabwe.
Ravindra Reaches 100 and Keeps Pushing
Ravindra’s century was his second of the tournament.
He accelerated sharply through the middle and late overs.
At the end of 40 overs, New Zealand were 292/5.
Australia had been 292/5 at exactly the same stage.
That comparison captured the match perfectly.
After 80 overs of cricket, the teams were essentially level.
Australia had made 388.
New Zealand still needed 97 from 60.
The chase was alive.
Pat Cummins Finally Removes Ravindra
Ravindra fell at 293/6.
He had made 116.
New Zealand still needed 96 from 58 balls.
That wicket should have been decisive.
Australia had removed the only batter with a century.
Six wickets were gone.
The required rate was close to 10 an over.
Neesham decided the game was not finished.
Jimmy Neesham Creates Another New Zealand Escape Attempt
Neesham scored:
58 from 39 balls
3 fours
3 sixes
Strike rate: 148.72
His innings did not begin as reckless hitting.
He worked the equation down.
He trusted the lower order.
Santner made 17.
Matt Henry made nine.
Boult contributed 10 not out.
Neesham kept enough of the strike and enough belief.
The required equation became 59 from 30.
Then 45 from 18.
Then 32 from 12.
Australia were still ahead.
New Zealand were still close enough to make them nervous.
Trent Boult’s Six Keeps the Final Two Overs Alive
The penultimate over began with New Zealand needing 32 from 12 balls.
Boult attacked Hazlewood.
Marnus Labuschagne appeared to complete a catch near the rope.
His momentum carried him into the boundary.
Six.
The moment had an ironic echo of New Zealand’s 2019 World Cup final heartbreak, where Trent Boult himself had stepped onto the rope after taking what looked like a crucial catch.
This time Boult benefited.
The chase stayed alive.
Neesham reached fifty later in the over.
New Zealand needed 19 from six.
Australia Enter the Final Over With a Fielding Penalty
The pressure increased because Australia had fallen behind the required over rate.
That meant they were allowed only four fielders outside the 30-yard circle for the final over.
New Zealand therefore had more gaps available at exactly the moment they needed 19.
Starc had to defend the total without the full boundary protection normally available.
The final over immediately became chaotic.
Starc’s Five Wides Bring New Zealand Back Again
Boult took one from the first ball.
New Zealand needed 18 from five.
Starc then attempted a yorker at Neesham’s pads.
The ball went down the leg side.
Josh Inglis could not stop it.
Five wides.
Suddenly the requirement was:
13 from five.
Starc had given New Zealand a route back into the match without Neesham even making contact.
The next three legal deliveries produced six runs through hard running.
New Zealand needed seven from two.
One boundary could change everything.
Marnus Labuschagne Runs Out Neesham With the Match on the Line
Starc delivered a high full toss.
Neesham could not strike it cleanly.
The ball dropped toward deep midwicket.
They ran one.
Then turned for two.
Labuschagne charged in.
He gathered cleanly.
He threw toward the striker’s end.
Neesham dived.
Inglis completed the run-out.
Neesham was short.
Out for 58.
That was the decisive moment.
Australia had not bowled Neesham.
They had not caught him.
They removed him through fielding under maximum pressure.
Six Needed From the Final Ball
Ferguson faced Starc.
One ball.
Six required.
A six would have tied the match.
Anything less would give Australia victory.
Starc went full.
Ferguson drove toward cover.
No run.
Australia won by five.
After 771 runs, the result had come down to one final swing.
Complete New Zealand Scorecard
New Zealand Batting: 383/9 in 50 Overs
| Batter | Dismissal | R | B | 4s | 6s | SR |
|---|---|---|---|---|---|---|
| Devon Conway | c Mitchell Starc b Josh Hazlewood | 28 | 17 | 6 | 0 | 164.71 |
| Will Young | c Mitchell Starc b Josh Hazlewood | 32 | 37 | 4 | 1 | 86.49 |
| Rachin Ravindra | c Marnus Labuschagne b Pat Cummins | 116 | 89 | 9 | 5 | 130.34 |
| Daryl Mitchell | c Mitchell Starc b Adam Zampa | 54 | 51 | 6 | 1 | 105.88 |
| Tom Latham (c, wk) | c Josh Hazlewood b Adam Zampa | 21 | 22 | 2 | 0 | 95.45 |
| Glenn Phillips | c Marnus Labuschagne b Glenn Maxwell | 12 | 16 | 1 | 0 | 75.00 |
| Jimmy Neesham | run out (Marnus Labuschagne/Josh Inglis) | 58 | 39 | 3 | 3 | 148.72 |
| Mitchell Santner | c Glenn Maxwell b Adam Zampa | 17 | 12 | 1 | 1 | 141.67 |
| Matt Henry | c Josh Hazlewood b Pat Cummins | 9 | 8 | 1 | 0 | 112.50 |
| Trent Boult | not out | 10 | 8 | 0 | 1 | 125.00 |
| Lockie Ferguson | not out | 0 | 1 | 0 | 0 | 0.00 |
Extras: 26
Total: 383/9 in 50 overs
Run rate: 7.66
Fall of wickets: 61/1 Conway (7.2), 72/2 Young (9.4), 168/3 Mitchell (23.6), 222/4 Latham (31.2), 265/5 Phillips (36.6), 293/6 Ravindra (40.2), 320/7 Santner (43.3), 346/8 Henry (46.4), 383/9 Neesham (49.5).
Australia Bowling
| Bowler | O | M | R | W | Econ |
|---|---|---|---|---|---|
| Mitchell Starc | 9 | 0 | 89 | 0 | 9.89 |
| Josh Hazlewood | 9 | 0 | 70 | 2 | 7.78 |
| Pat Cummins | 10 | 0 | 66 | 2 | 6.60 |
| Glenn Maxwell | 10 | 0 | 62 | 1 | 6.20 |
| Adam Zampa | 10 | 0 | 74 | 3 | 7.40 |
| Mitchell Marsh | 2 | 0 | 18 | 0 | 9.00 |
Eight Turning Points That Decided the Match
1. Head and Warner Add 175
Australia dismantled New Zealand’s new-ball plan before the 20th over.
2. Phillips Removes Warner, Head and Smith
His 3/37 prevented Australia from running completely out of control.
3. Cummins Smashes 37 From 14
Australia transformed a strong total into a target close to 390.
4. Hazlewood Removes Both New Zealand Openers
The chase slipped to 72/2 and Australia finally created early pressure.
5. Ravindra and Mitchell Add 96
New Zealand restored the chase and made 389 appear genuinely reachable.
6. Cummins Removes Ravindra at 293/6
The wicket of New Zealand’s centurion looked like the decisive breakthrough.
It was not quite enough.
7. Starc Concedes Five Wides in the Final Over
The equation moved from 18 off five legal balls to 13.
New Zealand were alive again.
8. Labuschagne Runs Out Neesham
Seven were required from two.
Neesham had the strike.
Labuschagne’s fielding intervention removed the batter most likely to win the match.
Why Australia Won
Australia won because they created runs in waves.
Head and Warner supplied the opening assault.
Maxwell restored acceleration after the middle-over slowdown.
Inglis and Cummins added the finishing power.
Then the bowling attack kept finding wickets before New Zealand could completely control the chase.
Australia did not bowl particularly cheaply.
That was never realistic in this game.
What they did was interrupt partnerships.
Hazlewood removed both openers.
Zampa took three middle-order wickets.
Cummins removed Ravindra and Henry.
Then Labuschagne supplied the final intervention in the field.
That sequence was enough.
Why New Zealand Lost Despite Scoring 383
New Zealand’s chase was outstanding.
It was also imperfect.
Twenty-two wides in Australia’s innings? No, those came from Australia’s bowlers in the chase? The match’s extras mattered on both sides, but New Zealand’s larger issue was wickets falling just before partnerships could become decisive.
Mitchell fell after making 54.
Latham never converted 21.
Phillips went for 12.
Ravindra fell with 96 still required.
Santner and Henry contributed, but neither stayed long enough to give Neesham a recognized partner for the last two overs.
The chase reached the final ball because New Zealand refused to surrender.
It failed because Australia kept forcing them to rebuild.
Australia’s Fourth Straight Win Changes Their World Cup
Australia began the 2023 World Cup with consecutive defeats.
By the end of Dharamsala, they had won four matches in a row.
The victory moved them to eight points and strengthened their hold on fourth place.
New Zealand also had eight points but remained third on net run rate.
Australia’s campaign had changed from early crisis to semifinal momentum.
That matters because this was not simply an isolated classic.
It became another step toward the Australian side that eventually won the tournament.
Head’s return would become especially significant.
He later produced another decisive century in the World Cup final itself.
New Zealand’s Second Straight Defeat Still Reveals Their Quality
New Zealand had started the tournament with four consecutive victories.
India then beat them.
Australia made it two defeats in a row.
Yet a five-run loss chasing 389 hardly suggested collapse.
The Black Caps had pushed one of the tournament’s strongest teams to the final ball.
Ravindra had confirmed his emergence.
Mitchell continued his strong form.
Neesham showed the lower order could still change matches.
Their bigger problem would come later as further defeats tightened the semifinal race.
But Dharamsala itself demonstrated that New Zealand could compete with almost any total.
Rachin Ravindra’s Breakout World Cup Reaches Another Level
Ravindra was only 23.
This was already his second century of the tournament.
He would go on to become one of the defining young players of the 2023 World Cup and later earned ICC Emerging Men’s Cricketer of the Year recognition, covered in TSE’s complete ICC awards review.
His 116 against Australia mattered because it came under extreme scoreboard pressure.
He was not protecting a total.
He was chasing 389.
Every quiet over increased the required rate.
Every wicket increased his responsibility.
He still scored at 130.
This Five-Run Finish Echoes Another New Zealand World Cup Escape
New Zealand had already experienced a five-run World Cup thriller four years earlier.
Carlos Brathwaite took West Indies from 164/7 to within one six of victory before Boult held the final catch.
That match appears in Match 32: Brathwaite Falls One Swing Short as New Zealand Escape by Five Runs.
Dharamsala inverted the experience.
This time New Zealand were chasing.
This time they produced the late assault.
This time somebody else survived by five.
New Zealand’s World Cup History With Australia Adds Another Chapter
The rivalry had already produced a wildly different classic in 2015, when Australia were dismissed for 151 and Mitchell Starc took six wickets before Kane Williamson eventually completed a one-wicket New Zealand victory.
That contest sits earlier in this series as Match 28.
The 2023 version could hardly have looked more different.
2015 was built around scarcity.
2023 was built around abundance.
One required survival around 150.
The other required survival around 390.
The tension was remarkably similar.
Australia’s World Cup Resilience Was Already Familiar
Australia have repeatedly found ways to survive World Cup matches after losing control.
Dharamsala required a different kind of resilience.
Australia did not need to recover from a batting collapse.
They needed to defend a huge score against a chase that refused to die.
The underlying quality was the same.
They kept finding one more response.
Frequently Asked Questions
Who Won Australia vs New Zealand in the 2023 World Cup?
Australia won by five runs after scoring 388 and restricting New Zealand to 383/9.
Who Was Player of the Match?
Travis Head was Player of the Match after scoring 109 from 67 balls in his first appearance of the tournament.
How Many Runs Did Rachin Ravindra Score?
Ravindra scored 116 from 89 balls with nine fours and five sixes.
What Was the Opening Partnership Between Head and Warner?
They added 175 for the first wicket.
Who Was New Zealand’s Best Bowler?
Glenn Phillips took 3/37 from 10 overs and was comfortably New Zealand’s most economical bowler.
Who Was Australia’s Leading Wicket-Taker?
Adam Zampa took 3/74.
How Many Runs Did New Zealand Need From the Final Over?
They needed 19.
What Happened in the Final Over?
Starc conceded five wides, New Zealand reduced the requirement to seven from two, and Neesham was then run out attempting a second run.
How Close Did New Zealand Come to Winning?
They reached 383/9 and needed six from the final ball.
Why Is This Match Included in A Celebration of 5000 ODIs?
Australia scored 388, New Zealand replied with 383/9, and after 771 runs the match still went to the final delivery. Head, Ravindra and Neesham produced major individual performances in a contest that repeatedly changed direction.